Quantcast
Channel: Deadlift Archives | StrongFirst
Viewing all 77 articles
Browse latest View live

The Tactical Strength Challenge as Celebration of Life

$
0
0

By Andrea U-Shi Chang, Senior SFG, TSC Coordinator

Willard (Jim) Sloan entered to compete in the StrongFirst Tactical Strength Challenge (TSC) last October. People enter the TSC for a lot of different reasons, but Jim, at age 56, entered for perhaps one of the best reasons of all – to celebrate his life.

Celebrating a New Start

Jim competed in powerlifting, arm-wrestling, karate, and judo since he was quite young, He ran in competitive events his whole life. Five days prior to competing in a Tough Mudder, Jim didn’t feel right, but being a tough guy, he went home instead of getting checked. His recent yearly physical had showed “perfect” blood work. The following day he drove himself to the hospital and found out he’d had a heart attack.

After open heart surgery, Jim began the return to health with his physical therapist and doctors. He was told by many of his healthcare workers that he shouldn’t lift weights. However, his cardiologist told him that his strength training over the years had saved him and he should continue.

Jim Sloan Tactical Strength Challenge

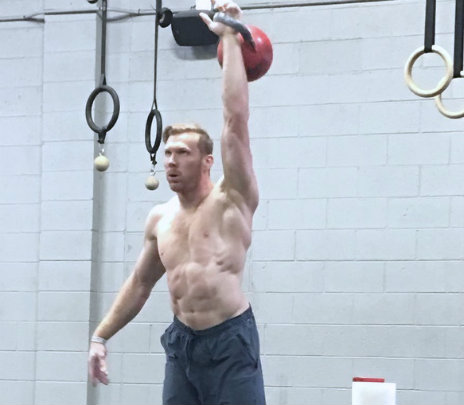
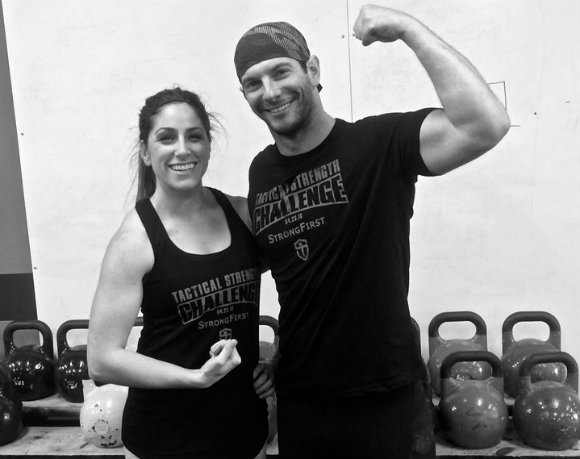
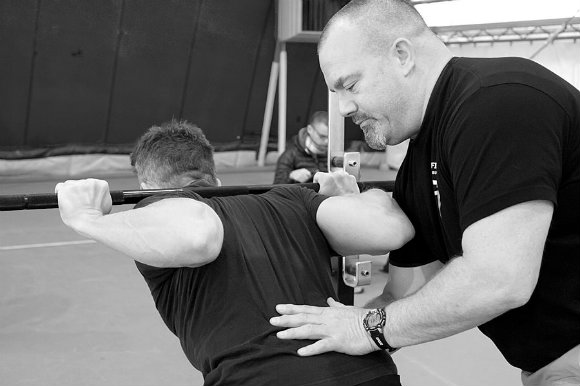
Willard (Jim) Sloan (right) with Seth Thomas, SFG-II, SFB (left)

Jim credits a great deal of success to his training with kettlebells. In his words:

“The best piece of training equipment in the world in my gym goes anywhere and can get both cardio and strength practice done in thirty minutes – for me, the simpler the better, Occam’s razor fits best. Pavel brought different protocols and implemented them in unique ways with modifications along the way to forestall stagnation – in my humble opinion I consider him the best coach/instructor in the world because he uses science not conjecture.”

Jim Sloan Tactical Strength Challenge

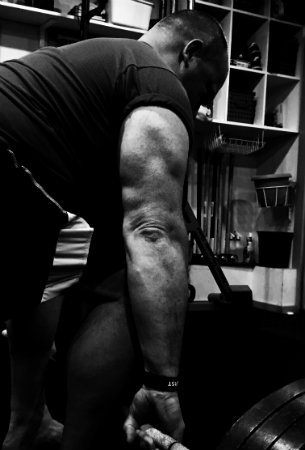
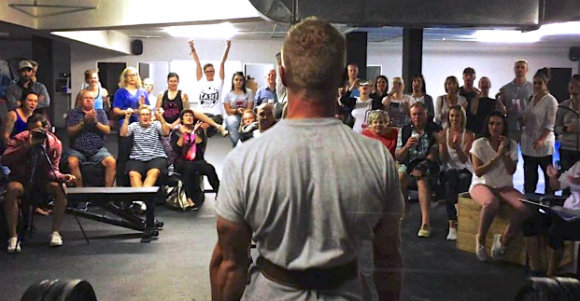
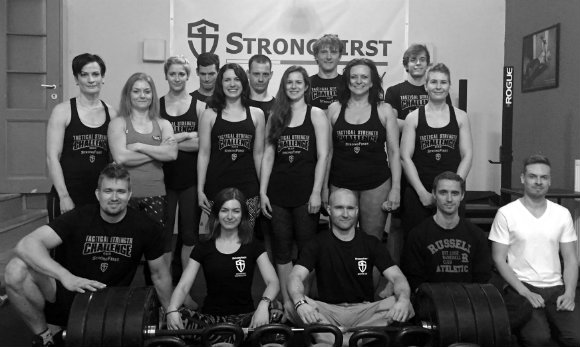
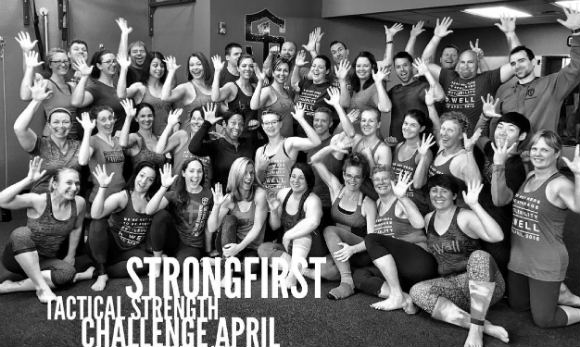
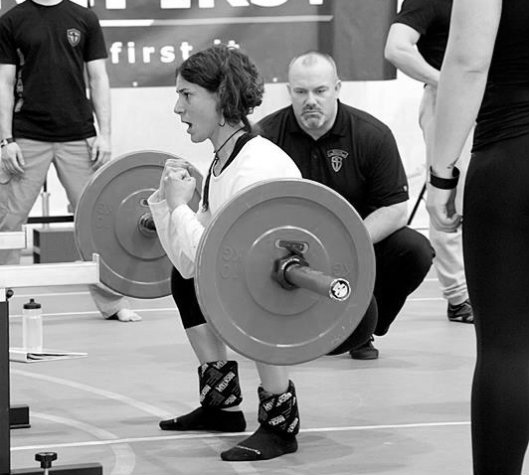
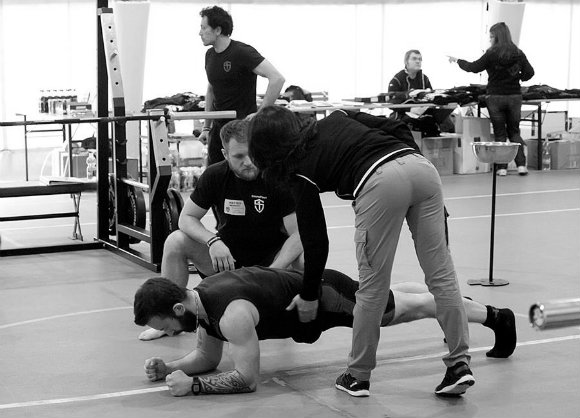
Jim at the TSC event at Albany Movement and Fitness

A Reason to Choose the Tactical Strength Challenge

October 4, 2014, was Jim’s one year anniversary of heart surgery and the date of the Fall Tactical Strength Challenge (TSC). Jim had begun his reborn life and was determined to compete.

The Tactical Strength Challenge occurs in the spring and fall of each year. The exercises are the same at each event and the athlete can compare scores from one competition to the next. It consists of the following three elements that challenge the athlete across multiple domains:

  • Strict pull-ups or flexed arm hang – tests absolute upper-body strength
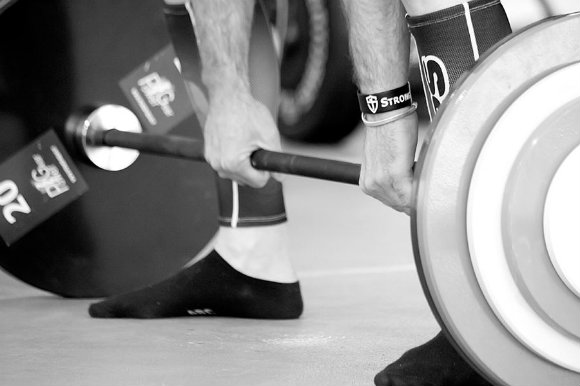
  • Deadlift –  tests absolute lower-body strength
  • Snatch test – tests work capacity by performing as many reps as possible

In Jim’s words:

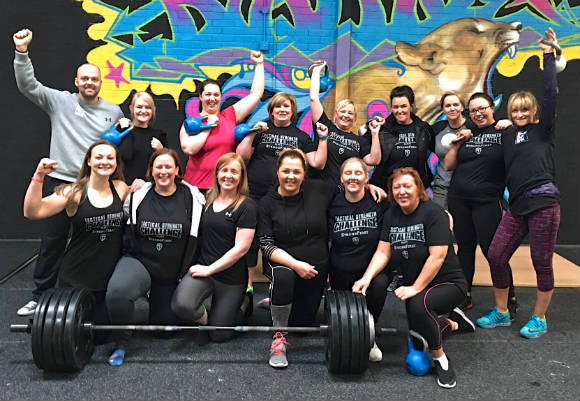
“Without a doubt, the TSC was the best competition I have ever been in, and I have been in a lot! I have never been around so many good, decent, folks who are driven, but also so very supportive. Each had a goal – to beat the weights – not each other. No fancy powerlifting suits here, just real strength and courage – these were people you want to get to know.

My daughter Kelsey and I are training for the upcoming TSC three days a week with kettlebells and weights, using an 80/20 principle. Twenty percent of our exercises give us eighty percent of our results. The pull-ups, deadlift, and snatches with additional supportive exercises to reduce weak areas, and rotating them accordingly. At age twelve my daughter Kelsey pulled 185 at 99 pounds bodyweight. At her current age and weight she is on pace to pull 250 plus and she is the best training partner in the world!”

Tactical Strength Challenge

Ready to host a TSC event? Contact us here to learn more: TSC@strongfirst.com


The post The Tactical Strength Challenge as Celebration of Life appeared first on StrongFirst.


TSC Competition Prep: The Final 2 Weeks

$
0
0

By Brett Jones, Chief SFG Instructor

It is approaching. The event you have been preparing for is drawing near.

Does it approach with the sound of the Jaws theme or the Rocky theme?

I’ll let you think about it for a moment…

You may have put months of training, sweat and focus into this event. And for the purposes of this article, we will assume that event is the April TSC competition. Pull-ups, deadlifts, and snatches – oh my! Will “the plan come together” as they used to say on The A-Team?

TSC CompetitionHopefully, you began your training plan with the end in mind. Working backward from a competition date and goals for that day is the best way to lay out the plan. There are many paths you could have been on to get to the event but now the time is here. So how do you arrive on “game day” ready to perform?

I don’t know who said it, but the point to keep in mind here is:

“You cannot win an event in the last week or so of training — but you CAN lose it.”

In other words, the work has been put in, and in the short-term leading up to the event, there is little to be gained but a lot to be lost if you try to “cram.” Let’s boil this down to the last two weeks before the TSC.

Your TSC Training Should Mimic TSC Competition

In general, I am a huge fan of replicating the event day as a training day in the last few weeks of training, especially. If your TSC is on Saturday at 3:00pm, I would try to get as close as possible to that time-frame for a main training day on Saturdays. You do not want to be in the routine of an evening exercise session and all of the sudden have to get up at 6:00am to compete (or vice versa). Teach your body it needs to be ready at a certain day and time; don’t just hope it will rise to the challenge.

The training for this day should basically mimic the event. If you have never had to perform an intense set of snatches after pulling a max deadlift and pull-ups, you might be in for a surprise. And competition days are not the days for surprises.

This does not mean that every Saturday is a day where you try to max out the three events. It means you should structure your training in the format of the event. If deadlifts are first in the order, then deadlifts are your first lift of that day, etc. This is applying a grease-the-groove type of mentality to your competition. When you have lived the competition for the last few Saturdays, you can roll into the event with a calm focus.

TSC Competition2 Weeks Before the TSC

Your last heavy or intense sessions should be about two weeks prior so the week before the event is easy recovery and prep work. April 11 is the day in our scenario, so April 4 should be an easy run-through of the event. But March 28 could have been your last intense session. Between the 28th and the 4th is up to you and your knowledge of how you recover.

Some people will be able to have some specific work on the events during that week while others need to glide in with easier work. For example, an individual with good recovery might hit the last intense pull-up work on the 30th and a good snatch practice on April 1st but the last heavy deadlift will likely have been pulled on the 28th of March or before. All of this is adjusted to you the individual. If this is your first time peaking for an event, you will learn a great deal and be better able to create your plan for future events.

How to Ensure TSC Competition Success

To succeed in a competition, a long-term build-up in training is required. Shortly before an event, not much more can be gained – but fatal mistakes can be made. I really like these tips for tapering from 2Peak:

  1. Don’t try out any experiments just before (or during) an event.
  2. Remain calm and collected. Remember that long term training brings results.
  3. Don’t try to make good any training deficit shortly before an event.

So, the TSC is approaching. Hopefully these tips will help you plan accordingly as you complete your training plan and compete on event day.

TSC Competition GroupFurther Reading:

Brett Jones StrongFirstBrett Jones is the Chief Instructor for SFG and a Certified Athletic Trainer and Strength and Conditioning Specialist based in Pittsburgh, PA. Mr. Jones holds a Bachelor of Science in Sports Medicine from High Point University, a Master of Science in Rehabilitative Sciences from Clarion University of Pennsylvania, and is a Certified Strength & Conditioning Specialist (CSCS) from the National Strength and Conditioning Association (NSCA). With over 20 years of experience, Brett is an Advisory Board member and presenter for Functional Movement Systems. He continues to evolve his approach to training and teaching, and is passionate about improving the quality of education for the fitness industry. He is available for consultations and distance coaching by e-mailing him at appliedstrength@gmail.com. Follow him on Twitter: @BrettEJones.

Sign up for the  Tactical Strength Challenge.


The post TSC Competition Prep: The Final 2 Weeks appeared first on StrongFirst.

Okinawan Strength: Developing the “Iron Body”

$
0
0

By Stuart McGill, PhD

Strength is context specific – to remain immovable, to be resilient to blows and forces, and to lift and handle large loads with low risk of injury require a specific type of strength. The body is stiffened to become unbreakable.

The martial arts of the island of Okinawa, Japan have embodied these strength principles to develop the “Iron Body.” They involve muscular stiffening augmented with some breathing and breath holding techniques. We have investigated some of these techniques in the laboratory and in the training room. They enhance strength and injury resilience.

Here are some thoughts on Okinawan strength and developing an iron body:

Injury Resilience

The fundamental tenant of resilience to absorb blows and remain immovable is enhanced through drills to achieve total body stiffness. This arises from muscular contraction with breath holding, or controlled breathing techniques to create a rigid, unforgiving cylinder out of the torso. The spine is compressed with this muscle action while it is postured into a neutral position. This means that the normal curves associated with upright standing are maintained. This is corrective for some people who excessively elevate their rib cage during strengthening efforts. The lungs are filled to about 70% of full volume, then the ribcage and abdomen are stiffened preparing them to bear tremendous load without any internal micro‐movement at the spine joints.

One of the best drills to achieve a neutral spine while learning the forceful breathing is one we recently assessed, and published in the Journal of Strength and Conditioning Research (Badiuk, Andersen and McGill, 2014). We named it the “Lewit” after Dr. Karel Lewit and his colleague Dr. Pavel Kolar of Prague, Czech Republic.

Dr. Lewit has contributed a lifetime of creative assessment and corrective exercise approaches based on postural and breathing mechanics. His inspiration combined with great insight into several strength correctives refined by my good friend Dr. Clayton Skaggs of St. Louis, led to this particular exercise. While the masters of Okanowan karate describe “deep abdominal breathing” together with “muscular locks,” which involve mindful focus, the Lewit forces this torso/abdominal compression with a neutral spine when practiced with the guidelines we published.

Okinawan strength with the Lewit

The Lewit is performance in a crook-lying position.

The essence of the Lewit is to develop engrams of torso stiffness where the torso cylinder remains compressed without ribcage flair. This technique may be employed in pulses or for situations calling for isometric torso strength over longer durations. When the skills acquired during the Lewit are transferred to standing, the visual gaze is locked onto the horizontal.

Very briefly (the interested reader is referred to our journal paper for a complete guide), the individual lays on the floor in a crook/lay position, while they teeter on the sacrum to achieve a neutral spine. Then the exercise really begins at the bottom of low tide breath, where the last remaining air is forced out of the thorax through tightly pursed lips creating a resistance.

Once this ability to create an “iron torso” is mastered, techniques to “root into the earth” are practiced leading to the full deployment of Okinawan strength in daily strength training.

“Root” Training

Rooting into the ground begins with skilled development of the “big foot.” The foot is trained to grip the ground using the toes and the heels. This creates the largest base of support possible. Stomping the foot to achieve the muscular root is a common practice.

A progression would begin with rooting both feet, then continue by standing and rooting with just one foot. These skills are tested by a partner pushing the stiffened and rooted trainee in pulses, and with slower forces to hone the ability to steer the line of drive through the linkage into the rooted feet. Pulses may be applied with a stick – essentially the partner is given full permission to “beat the trainee” looking for a “soft spot.” Any soft spot is indicated by pain. The trainee learns to stiffen the area, eliminating the tissue compliance and pain. The forces applied to challenge the “rooted posture” may be made more complex with the addition of twisting loads applied to the arm, leg, and torso.

Other progressions may include learning to wedge the body against immovable objects. Here the body is stiffened to apply isometric force to the object, and well rooted and wedged. Mindful focus is used to conduct a survey throughout the body, auditing for any feeling of weakness or compliance. This is then corrected with more regional stiffness.

Putting This Together to Enhance Performance & Injury Resilience

Unfortunately, in my clinical practice consulting on back pain, I see far too many patients created by trainers prescribing strength training without sufficient “Okinawan strength.” They mistakenly have clients perform exercises such as deadlifts, thinking that preservation of a neutral spine is the primary coaching cue. Those practicing Okinawan strength would begin with:

  • Establishing a root to the floor.
  • The torso is stiffened with motion only at the hip and knee to allow descent to the bar.
  • As the grip is established on the bar the latissimus and torso muscles form an “anti‐shrug” effort adding more torso stiffness.
  • The breath is held and the bar is pushed downwards further compressing the torso.
  • The stiffened body becomes a wedge under the bar.
  • Then instead of “lifting the bar,” mindful thought is directed to “pulling the hips forward and through.”

Of course this would be preceded by hip assessments to establish the safe depth of the squat — whether the client is qualified to pull the bar from the floor or whether they should pull the bar elevated on blocks. It is important not to impinge the hips nor sacrifice the neutral position of the stiffened spine. If you are familiar with the coaching cues of my friend and elite coach Marty Gallagher, coaching superstars in the powerlifting world such as Karwoski and Gillingham, you will be familiar with Okinawan strength principles.

Other athletic endeavors may require the ability to burst out from Okinawan stiffness into a speed task. Speed is only possible with muscle relaxation. Pavel Tsatsouline has promoted these ideas via kettlebell techniques where he hones cyclic stiffness and relaxation. There are several relaxation drills to create speed out of a base of Okinawan strength that enables faster limb motion, and higher strike force.

Many techniques throughout the martial arts have been given traditional explanations and Okinawan techniques are no exception. For example, “pushing the tongue forcefully to the roof of the mouth behind the front teeth” traditionally has been explained as the connection of energies between body meridians. However, modern scientific investigation in our lab has confirmed that this engages the deep flexors of the neck, stiffening the neck and providing an anchor for the trapezius complex to begin the formation of the stiffened tower that will enhance lifting and pulling ability.

There is a downside to some iron body “hardening exercises” from traditional Okinawan techniques of striking and being struck. Some old masters have damaged their hands from years of “strike hardening” that they are substantially disabled. However, those who have developed the skill of muscularly hardening with pristine technique and no joint damage build impressive durable athleticism into their later years. As a testament to good form, Marty Gallagher has just enjoyed his 45th year of pulling 500 pounds from the floor.

More in‐depth analysis of creating injury resilience and performance enhancement is contained in my textbook Ultimate Back Fitness and Performance.

References:
1. Badiuk, B.W.N., Andersen, J.T., McGill, S.M. (2014) Exercises to activate the deeper abdominal wall muscles: The Lewit. J. Strength Condit. Res., 28(3):856‐60. doi: 10.1519/JSC.0b013e3182aac3f3.
2. McGill, S.M. Ultimate back fitness and performance, Fifth edition 2014, Backfitpro Inc., Waterloo, Canada, ISBN 0‐9736018‐0‐4

The author thanks Dr. Craig Liebenson, LA Sports & Spine, who inspired this article.

The post Okinawan Strength: Developing the “Iron Body” appeared first on StrongFirst.

The Subtle But Essential Role of the Triceps Brachii in the Deadlift

$
0
0

Huh? Shouldn’t we be talking about posterior chain, glutes, hamstrings, lats, or erector spinae? Yes, we will in the future, but for this article, we will discuss the importance of the triceps brachii and what it has to do with improving your deadlift, both from a performance and injury preventative standpoint.

Obviously, the triceps is not what I consider to be a prime mover for the deadlift, unlike the hamstrings, glutes, lats, and erector spinae. However, maximally contracting your triceps prior to pulling the weight off the floor will improve your deadlift in the following ways:

  1. Decrease the chance of a biceps brachii tear
  2. Lengthen your upper extremity to the max, helping decrease the distance (albeit small) the bar travels from the floor to lockout
  3. Help lock down your lats prior to the start of the lift
  4. Increase your grip and contribute to the overall tension in the body and the “wedge” prior to liftoff through the principle of irradiation
  5. Look really cool in photographs of your deadlift

Let’s look at each one of the above points in more detail.

Deadlift Essentials StrongFirst
There’s an essential part of the deadlift you may be missing.

Decrease the Chance of a Biceps Brachii Tear

By maximally contracting the triceps, you also maximally lengthen the biceps prior to the start of the deadlift. Why is this important? A lot of lifters, whether in the gym or at a competition, leave a little slack in their arms, consciously or not, before they start the lift. This creates an automatic lengthening followed very quickly by a rapid straightening of the elbow, all under an extreme load while the weight is coming up.

Over time, this will create cumulative micro-trauma in the bicep, especially at the insertion on the forearm. This can lead to a weakening of the biceps and persisting pain, especially near the elbow joint. At some point, if left uncorrected, the lifter will suffer a partial or complete tear of the muscle, forcing him or her to take time away from the barbell to recover.

As we teach at the SFL Barbell Certification, starting the pull with a maximally contracted triceps, takes all the slack out of the upper extremity, preventing the micro-trauma from occurring at the start. This in turn will allow the biceps to adapt to the lengthened position under load, making it more resilient over time.

Lengthen Your Upper Extremity to the Max

I love physics and math. Everything we do at StrongFirst is influenced by these two disciplines, and the deadlift is a great example. Let’s take a look at the calculation for work: Work = Force x Distance

In our scenario:

  • Work is the amount of energy expended to move the loaded barbell a certain distance
  • Force is the weight involved
  • Distance the length of travel of the barbell

By maximally contracting your triceps, and achieving full extension of the elbow (0o degrees) before the barbell starts to move vertically, you actually decrease the distance the bar travels. This contraction of the triceps is similar to “pulling your kneecaps up” during the kettlebell swing, in which you are contracting your quads and achieving full extension of the knee. You also create a better wedge at the beginning in addition to preventing curling of the bar during the lockout phase by maintaining the contraction of the triceps.

Note: “Curling” refers to lifters’ bending their elbows to “assist” the lockout. Most of the time this is also associated with some sort of shrugging of the shoulders to “aid” in the completion at the top.

I tell the students at the SFL Barbell Certification that I want to see all three heads of the triceps as they set up for the deadlift. Seeing all three heads present ensures a proper lengthening of the upper extremity and decreases the stress to the bicep. Plus, the slack is taken out of the arms, helping ready the body for the lift.

Triceps Brachii in the Deadlift
All three heads of the triceps should be visible in the deadlift.

Again, by lengthening your arms (contracting your triceps) at the beginning of the movement, the distance the bar travels from start to finish will decrease, thereby lowering the amount of work you need to do to lift heavy weight.

Help Lock Down Your Lats Prior to the Start of the Lift

If you have attended an SFL, you undoubtedly heard me say, “Use your….” which by the end of the cert weekend, everyone finishes for me by shouting out the word, “Lats!” In the deadlift, we use the lats to help lock down the torso and contribute to its stiffness during the lift, helping make the deadlift a true hip hinge versus a many-body-parts-hinge that we see a lot of.

What does this have to do with this article? The triceps is made of three heads, hence the name. It has a long head, lateral head, and a medial head. When perusing an anatomy book, you will see the long head attaches to the scapula below the glenoid cavity. Just like the lats, it helps to extend and adduct the humerus. When you are setting the lats for the deadlift, contract your triceps hard and you will feel a further increase in the ability of your lats to “squeeze” and tighten.

Triceps Brachii in the DeadliftYou can test this on yourself right now. Shrug your shoulders hard, then reverse that and anti-shrug them even harder. Now, holding that position, and with your arms hanging straight down by your sides, watch what happens when you contract your triceps hard. I’ll wait… Did you feel that? Now do that right before you pull off the floor and not only will it help lock down your lats, it will also help keep your arms straight at lockout and help you finish at the top.

Increase Grip and the “Wedge” Through the Principle of Irradiation

In addition to helping lock down your lats before the lift starts, maximally contracting your triceps will raise the tension-o-meter needle in your body. Remember, the more tension you can develop before lifting heavy weight, the greater the chance you will be successful during your set and the lesser the chance you’ll be injured.

Crush the bar with your grip, maximally contract your triceps to lengthen your arms and help lock the lats down, anti-shrug as hard as you can (LATS!), and squeeze your abs—and guess what? You just generated more power and strength by creating a “wedge” to deadlift from.

Interesting to note is that most lifters don’t use the triceps properly when deadlifting. Go watch someone deadlift at the nearest gym. They may be crushing the bar, even using their lats and abs, but their triceps will be soft, creating a crack in the tension system while at the same time leaking energy and potentially setting themselves up for injury in the future. I see this all the time when I am refereeing powerlifting meets.

Look Really Cool in Photographs of Your Lift

Enough said! It’s awesome to see someone deadlifting heavy weight and see the three heads of the triceps working hard. You know at this point the athlete is generating a tremendous amount of tension and is serious about moving some weight.

Next time you are deadlifting, squeeze those triceps as hard as you can before the weight leaves the floor. Show all three heads of the triceps throughout the lift. You will generate more strength and power and reduce the incidence of injury to your biceps tremendously. Enjoy the increase in your deadlift!

The post The Subtle But Essential Role of the Triceps Brachii in the Deadlift appeared first on StrongFirst.

The 3 Pillars: How to Build Skill While Being Real

$
0
0

“I never went to the gym to workout. I went to the gym to learn and the workout was a byproduct.”—Dr. Ed Thomas

In my work with Dr. Thomas, Doctor of Physical Education and Physical Culture historian and expert, I have gained an appreciation for many “old school” principles and techniques. Perhaps the most powerful of these is his mindset on skill development. Approaching training as a learning opportunity is a massive shift from the idea of working out. And it is in line with what Pavel has been advocating for years—“Treat your training as a practice not a workout.”

However, there can be issues with the “learning not working out” approach. Specifically, the two classic mental traps of “paralysis by analysis” and “It’s not good enough.” So let’s dive into an old school approach to building skill while being real.

Understanding the 3 Pillars

Dr. Thomas refers to the Three Pillars of Progression, Variety, and Precision. You can filter learning almost any skill through the Three Pillars:

1. Progression

Progression is the journey and steps toward mastering a skill. It can be thought of as a “learning ramp.” This ramp can be gradual and long or steep and short. It can have plateaus and even dips or regressions, but as long as we have a goal targeted, we should be able to plot where a student is on their own individual ramp.

Be mindful not to shove a student up the ramp before they are ready and, conversely, do not hold a student back. As long as a student has the prerequisite movement capabilities to perform the skill and is safe in performing the movement, then let them safely perform the skill.

3 Pillars of Learning

2. Variety

Variety includes the tools used along the progression ramp to assist a student in overcoming a learning hurdle or refining an aspect of the skill to assist them in reaching the next step in the progression journey. In StrongFirst, we call this “specialized variety”—drills used to enhance the goal skill. For example, we may have a student struggling with the one-arm swing perform the hand-to-hand swing to enhance shoulder packing and positioning. Or we may return to the deadlift to allow a student to transfer the hip hinge of the deadlift to the swing. Or we could use the shoulder positioning of the get-up to allow a student to overcome the learning hurdle of packing the shoulder in the one-arm swing.

Variety is not a random collection of things meant to entertain and it is not the periodization of skills to keep physical progress moving forward. Variety can include cues and drills used to assist in the progression of learning a skill.

3. Precision

Precision is perhaps the most lost and most misunderstood of the Three Pillars. Precision means asking for specific details and aspects of the skill to be met. It is a dancer being asked to point her toes more. It is a martial artist being asked to sink one inch deeper into a stance. It is an athlete being asked to turn his shoulder just one degree further toward the target.

Precision is a blessing and a curse, and it is where the other issue of learning a skill, “paralysis by analysis,” can kick in. Pavel referred to it as “understanding is a delaying tactic.” Consider that a drowning person does not want to understand hydro-dynamics. He just wants to swim well enough to not drown. Golfers can get lost in trying to “feel” where the club face is during one aspect of the swing or in their breathing during the swing. Great golfers and athletes find the precision over time with a realistic expectation of becoming better with every practice. Accepting where they are now, but knowing where they are going in their skill development.

We cannot stop at “good enough,” but we cannot become frozen in place because something isn’t precise enough. As a coach and trainer, I will never stop asking for precision, but I accept where the student is on their progression ramp and choose the right variety to assist them in achieving the precision needed to reach the next step in their journey.

3 Pillars of Learning

Into Action

Progression toward a skill using variety to overcome obstacles while holding an expectation of realistic precision. As an instructor, this mindset should allow you to better plot a student’s course of learning. However, it all depends on the individual you are teaching. There will be students that progress from deadlift to swing in the first five to ten minutes of a session, and there will be students that will refine the deadlift for a week before progressing to the swing.

Why? A great question! It could be a movement-related issue that prevents the student from achieving the correct position (although setting a movement baseline with the FMS would tell you that). It could be a strength issue where the movement is available but controlling that movement is difficult. So how do you know to move on from something like the kettlebell deadlift to the kettlebell swing?

Well, the kettlebell deadlift is a skill that can be plotted on a progression ramp like this:

  1. Proper position at the bottom before the kettlebell is lifted. A proper hip hinge that includes having the shoulders above hips, and hips above knees with a neutral spine.
  2. Knowing how to brace and power breathe.
  3. Pushing through the ground to a great lockout, which means a straight line from the ear to the ankle with a strong stable body (and no back extension).
  4. Reversing those steps to safely place the kettlebell on the floor again.

The lockout and the bottom position of the deadlift are static, so they are perfect for isometric drills and positioning work at each end of the movement. If the student cannot reach the bottom position with good form, then a variety drill of performing an isometric at the perfect bottom position for three to five seconds then releasing the kettlebell and returning to the top unloaded might help the student progress to a full deadlift in only a few reps. In doing this, you are asking the student to practice the precision of the bottom of the hip hinge position with a variety drill that progresses them toward refining the skill of the kettlebell deadlift.

3 Pillars of LearningThe 3 Pillars Are for Practitioners and Teachers Alike

If you are an individual practitioner and not an SFG, the Three Pillars can still assist you in refining and perfecting your skills while being real. Use video to film yourself and compare it to a body relative example (a person with similar body structure as yourself) of someone with high skill in that area. Plot where you are on a progression ramp and find a variety drill to assist you in one area of the skill you would like to improve. Apply the drill, and then go back to the goal skill to see how it impacts that. If the drill assists you in moving through an obstacle on your progression ramp, then use it until that obstacle is overcome. If it does not improve the goal skill, then move along to another variety drill until you find one that works.

The reality is we are all learning and improving with every rep (at least, that is my goal), and thus we will perform a lot of “less than perfect” reps in that process. Enjoy the process and use the Three Pillars to assist you in that journey.

The post The 3 Pillars: How to Build Skill While Being Real appeared first on StrongFirst.

Spring 2016 TSC Results

$
0
0

Recap

Ladies and Gentlemen, the Spring TSC results are final!

Thank you to everyone who took part in this very unique day of worldwide strength, spirit, and camaraderie. This April 2016 TSC included nearly 1,200 participants—the most in history.

We heard reports from all over of people breaking personal records in at least one of the three events, and of many locations where every single person in attendance achieved a personal best lift.

Our Women’s Novice division is once again the largest category with 338 participants, and for many (if not most) of them, this TSC was their first-ever strength competition of any kind. And by all accounts, they had an awesome time. In case you were wondering, all Novice category winners (top three men and women) must graduate from the Novice category in all future TSC competitions, and enter in the Open, Elite, or Masters (if qualified by age).

TOP COMBINED SCORES IN EACH CATEGORY

And so now, let us acknowledge the highest combined scores in each of the eight categories. For full rankings and results, please visit the leaderboard HERE.

Women’s Novice

1st: Martina McDermott at Hybrid Fitness in Belfast, Ireland
Snatches 139, FAH 85 sec, Deadlift 319

2nd: Ilona Wilson at The Yard Athletic in Johannesburg, South Africa
Snatches 132, FAH 105 sec, Deadlift 319.5

3rd: Katie Bogs at Tyson’s Playground in Stafford, VA
Snatches 144, FAH 74 sec, Deadlift 265

Women’s Open

The Women’s Open was a close race, ending in a tie for first place. Both women are from Salt Lake City and competed head-to-head. Nicole Davis had an impressive 360lb deadlift, and Saxony Record, fairly new to our community, unable to complete a pull-up just a year ago performed twelve neck-to-bar reps! What a great showing by both athletes.

1st Tie: Nicole Davis at Brickwall CrossFit South in West Jordan, UT
Snatches 124, Pull-ups 15, Deadlift 360

1st Tie: Saxony Record at FTR in Salt Lake City, UT
Snatches 134, Pull-ups 12, Deadlift 305

3rd: Vix Sharp at Hybrid Fitness in Belfast, Ireland
Snatches 141, Pull-ups 12, Deadlift 303

Honorable mention goes to Roxanne Myers who took first place in two events, both the pull-ups with 18 and snatches with 149. Very impressive.

Women’s Elite

An incredible showing in the women’s Elite division was led by Hyun Jin Choi—she took first in the 20kg snatch with 118 reps and in the deadlift, pulling 348lbs. Hyun Jin Choi was proud to be one of those competitors performing a “TSC Hat Trick” (improving in all three categories).

1st: Hyun Jin Choi at Powerzone in Seoul, South Korea
Snatches 118, Pull-ups 9, Deadlift 348

2nd: Sara Cooper at Shropshire Sports Training in Ellicott City, MD
Snatches 116, Pull-ups 10, Deadlift 305

3rd: Aleana Myers at Gainz Strength Training Gym in Vancouver, WA
Snatches 114, Pull-ups 7, Deadlift 320

Women’s Masters

1st: Angelique Shoeman at The Yard Athletic in Johannesburg, South Africa
Snatches 153, Pull-ups 10, Deadlift 269

2nd: Elizabeth Arndt at Omaha Elite in Omaha, NE
Snatches 159, Pull-ups 3, Deadlift 305

3rd: Linda Mertens at Crow River CrossFit in Plymouth, MN
Snatches 160, Pull-ups 3, Deadlift 285

Men’s Novice

1st: Mike Wagner at TNT Fitness Results in Winneconne, WI
Snatches 164, Pull-ups 26, Deadlift 600

2nd: “Dangerous” Dave Doyle at Box 33 in South Femantle, Australia
Snatches 154, Pull-ups 25, Deadlift 507

3rd: Karlo Fresl at OutFit in Samabor, Croatia
Snatches 134, Pull-ups 23, Deadlift 496

Men’s Open

1st: Tim Almond at Box 33 in South Femantle, Australia
Snatches 165, Pull-ups 37, Deadlift 551

2nd: Aldo Alberico at Lugo, Ravenna, Italy
Snatches 151, Pull-ups 22, Deadlift 584

3rd: Jason Marshall at Lone Star Strength in Lubbock, TX
Snatches 148, Pull-ups 20, Deadlift 605

Men’s Open Fun Facts

  • 35 men deadlifted over 500lbs
  • 34 men completed 20 or more dead hang pull-ups
  • 35 men did 125 reps or more of snatches


Men’s Elite

The always impressive and still undefeated Derek Toshner leads the pack in the men’s Elite. He didn’t win a single event but with two second places and one third place he isn’t giving up his title anytime soon.

1st: Derek Toshner at TNT Fitness Results, Fon Du Lac, WI
Snatches 139, Pull-ups 20, Deadlift 600

2nd: Ryan Karas at Vigor Performance in Loveland, CO
Snatches 101, Pull-ups 21, Deadlift 635

3rd: William Stott at Brickwall CrossFit South in Salt Lake City, UT
Snatches 107, Pull-ups 17, Deadlift 639

Men’s Masters

1st: Steven Horwitz at his gym in Rockwall, TX
Snatches 129, Pull-ups 18, Deadlift 475

2nd: Brian Smith at Primitive Strength in Amarillo, TX
Snatches 126, Pull-ups 15, Deadlift 415

3rd: David Knuth at TNT Fitness Results in Lomira, WI
Snatches 141, Pull-ups 7, Deadlift 485

Congratulations to all of you!

TSC Event Snapshots

Just a few random photos from the day:

April 2016 TSC ResultsApril 2016 TSC Results

April 2016 TSC ResultsApril 2016 TSC ResultsApril 2016 TSC ResultsApril 2016 TSC Results

April 2016 TSC ResultsApril 2016 TSC ResultsApril 2016 TSC ResultsApril 2016 TSC ResultsApril 2016 TSC ResultsApril 2016 TSC ResultsApril 2016 TSC ResultsApril 2016 TSC ResultsApril 2016 TSC ResultsApril 2016 TSC ResultsApril 2016 TSC ResultsApril 2016 TSC ResultsApril 2016 TSC ResultsApril 2016 TSC ResultsApril 2016 TSC ResultsApril 2016 TSC Results

Participating Host Facilities

Finally, thank you to every one of these facilities for hosting this Spring 2016 Tactical Strength Challenge.

evolution fitness systems | tucson | az
heavy metal girya | birmingham | al
hybrid fitness | belfast | antrim
fvt boot camp and personal training | sacramento | ca
crossfit virtus les docks | marseille | bouches du rhone
velocity strength & fitness | chico | ca
north beach kettlebell | san clemente | ca
breathrough strength & fitness | woodland hills | ca
projectmove | littleton | co
guliver fitness | solin | croatia
full force personal training | modesto | ca
armourbuilding | peachtree corners | ga
vigor performance | windsor | co
functional training prague | prague | dejvice
catalyst strength studio| north liberty | ia
atlanta strength and conditioning | marietta | ga
spencer school of strength | spencer | ia
method training | peoria | il
victory strength and fitness | 2503 fairview pl | in
the yard athletic | johannesburg | gauteng
bestrong training | wichita | ks
strongfirst israel | bat yam | israel
crossfit i35 | overland park | ks
powerzone | seoul | gyunggi-do
fawn friday kettlebell training | st. paul | mn
art & strength | baltimore | md
chicago primal gym | chicago | il
vault fitness | eden prairie | mn
rapid results fitness | durham | nc
reactive training | glasgow | lanarkshire
efx fitness | manchester | nh
shore results | atlantic highlands | nj
nj kettlebells | fairfield | nj
omaha elite kettlebell | omaha | ne
kings thai boxing | new york | ny
crossfit solaria | omaha | ne
mojo strength | matraville sydney | nsw
move physical therapy | monroe | ny
mansfield ymca | mansfield | oh
catskill kettlebells | delhi | ny
firebellz | albuquerque | nm
courthouse south river road club | salem | or
today’s health and fitness | toowoomba | qld
misfit gym | burleigh heads | qld
queen city kettlebell | cincinnati | oh
empowered strength | bend | or
willpower strength & conditioning | ardmore | pa
lone star kettlebell | lubbock | tx
crucible krav maga | plano | tx
charleston kettlebell club | charleston | sc
iron strength kettlebell gym | sugar land | tx
palextra | lugo | ravenna
alpha fitness | east greenwich | ri
24 hour fitness | the woodlands | tx
moulton kettlebell club | roanoke | tx
impavidus gym | ashburn | va
hardstyle kbjj | corpus christi | texas
primitive strength | amarillo | tx
box 33 | perth | wa
fit by red | seattle | wa
gainz strength training gym | vancouver | wa
brickwall crossfit south | west jordan | ut
the lab strength & fitness | spokane | wa
be better | gig harbor | wa
kettlebility | seattle | wa
tnt fitness results | fond du lac | wi
tysons playground | vienna | va
heaven hell asd | sarmeola di rubano | italy
ironkore performance training systems inc | toronto
fuelhouse | seattle | wa
hybrid gym | gabcikovo
tnt performance | brookfield | wi
bkc gym | bristol

FALL TSC SCHEDULED FOR OCTOBER 1, 2016——MARK YOUR CALENDAR

The post Spring 2016 TSC Results appeared first on StrongFirst.

When Tension Is a Beautiful Thing

$
0
0

No, this isn’t a psychology lesson on stress. I am neither discussing different types of headaches, nor the strength properties of a barbell and its ability to resist bending and becoming permanently deformed.

I am talking about what your body needs to generate prior to loading it, be it with bodyweight, kettlebell, or barbell exercises. This has already been discussed in many different ways and on many different forums. This is my take on it.

Tension and the Great White Sharks

The impetus for me to write about this topic was my recent trip to the Southern Hemisphere to teach two SFL Certifications on back-to-back weekends. After teaching the SFL Johannesburg, South Africa, Master SFG Shaun Cairns invited me to spend a few days with his family in Cape Town before I headed over to Australia for the SFL Perth Cert. While I was in Cape Town, Shaun arranged a trip for us to go cage diving with great white sharks. While waiting for the boat to leave shore, one of the other participants partaking in this great adventure asked me some questions about training. One of the questions pertained to him having dull lower back pain while back squatting.

Back Squat Tension at the Start
A demonstration of proper tension at the top of the back squat—similar to a vertical plank.

After dispensing the usual small print-type discussion about not having examined him, not knowing his history, etc., we talked about several things that could potentially be causing his issues. After diving more into his issue (excuse the pun), it quickly became apparent that he was not generating enough tension throughout his body prior to commencing the lift. By not utilizing the tension ability of the body properly, he was placing his spine and other joint structures at risk for dysfunction and injury. For the moment, his symptoms were only a dull ache in his lower back.

Hinging, Winking, and Laziness

One of the most common mistakes I see with the back squat or deadlift is neglecting to create the required tension to properly execute the lift. This is most commonly demonstrated by the athlete either hinging with their lumbar spine along with hinging at the hip, instead of hinging solely via the hip joint, or “winking” at you with their buttocks and lower back, causing tremendous stress at the lower lumbar and sacral regions of the spine. (Note: there could be other causes for these issues. A proper assessment/screen will help to uncover these.)

Neutral Spine With Tension
Instructing the student to keep a neutral spine (no lumbar hinging or flexion) in a good morning.

In reference to the “required tension” mentioned above, this is the tension needed to improve your performance but also decrease the chance of injury during loaded movements. The front, sides, back, top, and bottom of the torso are the areas where tension is needed and created. During the back squat and deadlift, a lot of athletes become “anterior chain/core lazy,” meaning they are so concerned about moving the weight, they forget to turn on their anterior components. Some turn on these components naturally, some don’t. For the latter, they need to consciously establish the motor pattern.

Part of the laziness comes from the bar either being on the top of the upper back, as in the back squat, or in the hands of the deadlifter, with their emphasis on the posterior chain activation of hamstrings, glutes, and erectors. Most of the time, this “laziness” will not appear at the start of the back squat or at the top of the deadlift, but on the descent and ascent of the back squat and the ascent of the deadlift.

This is in direct contrast to the Zercher or front squat, which requires the anterior components to be on high alert, otherwise you will lose control of the bar and the lift. With the bar on the back of your shoulders during the back squat, you do not have to work as hard anteriorly if you don’t want to. This scenario can create the aforementioned issues of lumbar hinging and/or “butt winking” to occur during the lift.

Great Tension in the Zercher Squat
An example of great tension in the Zercher squat.

Get Tighter

Once I make the athlete aware of what is going on and explain to them what they are doing and why they need to change it, we get to work on it. As we routinely say at the SFL Certification, don’t be afraid to reduce the weight on the bar to help pattern this new method of creating the correct tension.

Remember, the body and mind revert to training when under stress. If you try to ingrain this new method while loading the body with >80% of your 1RM, you will not be successful. Your body will do what it takes to achieve the task in front of you, even if it means reverting back to its old ways of training. Backing off the weight means letting the ego go for a bit, knowing that in the end, you will become stronger than you were before and in a safer manner.

I am not the first one to state this, but this “regression before progression” is important to get the proper motor pattern hardwired in your cerebral cortex and the rest of the neurological system. Once mastered and proven under a lighter load, then progressing to heavier loads will be prudent, but always being mindful of maintaining the new method. If you feel a breakdown at any point, back off a little, pattern it, and then progress again.

I always remember this quotation from Andy Bolton: “Without tightness, you cannot have strength. All the best lifters get tighter than the average lifters. Simple as that.”

Here are some ways to get tighter than average:

1. The Hard Style and Hartle Planks

To practice the tightness required, especially anteriorly, train the hard style plank. After mastering the hard style plank, you can progress to adding even more tightness with the Hartle plank—you do this by simultaneously pulling your elbows toward your toes and your toes toward your elbows (isometrically). Your pelvis will rise. Cramp the glutes hard and push your pelvis down to bring the body back into a straight line—an action similar to the kettlebell swing. The toes need to be fully extended and the ankles maximally dorsiflexed.

Practicing this will start to “turn on” the anterior components in a horizontal or straight line. This in turn can and will carry over to the trunk flexed/hip flexed positions of the back squat and deadlift, but you need to be mindful to make sure you stay tight anteriorly.

Tension in the Plank
Master the hard style plank, and then progress to the Hartle plank.

2. Pausing and Facilitating

With no load or a very light load (and sound technique), have a training partner stand to the side of you during the back squat and/or the deadlift. Have them command you to stop at various stages of the eccentric and concentric parts of the back squat and the concentric aspect of the deadlift. You will not know when they will do this. When you are paused, and with your permission ahead of time, your partner will check to make sure you are remaining tight by tapping on your sides and front.

This will help facilitate the appropriate neuromuscular response to contract and create the needed tension. Once you have mastered this practice, start to add load. As stated above, if you start to deviate from being able to keep tension under progressively heavier loads, back off the load slightly, master it, then progress again.

3. The Zercher and Front Squats

Training these squats will also help the anterior components to “turn on.” While not exactly specific to the back squat and the deadlift, training these, along with the plank, will create the synaptic pathways in your cerebrum and cerebellum to generate a greater facilitation and awareness of activating the anterior components. Eventually, after enough practice, this facilitation and activation will be become subconscious and second-nature.

Tension in Zercher and Front Squats
Left: Zercher squat; Right: Front squat

As a side note, utilizing the steps above will also make your bodyweight and kettlebell training better, especially the grind-type moves. Military press, both barbell and kettlebell, will improve. Squats, pull-ups, OAPU and OAOLPU will improve, as well. Even the ballistic moves—swings, cleans, and snatches—will show improvement in performance, specifically at the top positions, and you will lessen the chance of injury overall.

Tension, the neuromusculoskeletal variety, is a beautiful thing when used the correct way. It will help increase your performance and decrease your chance of injury. Learn to use it properly and it will serve you well.

The post When Tension Is a Beautiful Thing appeared first on StrongFirst.

Patience: The Unexpected Key to Power

$
0
0

“The greatest power is often simple patience.” —E. Joseph Cossman

I would add that patience is the key to power. In my last article, we talked about the importance of using patience in your programming. Now we look at how patience can be the key to your power.

Power can be defined as the rate at which work is done or energy is emitted or transferred. From a physical standpoint, we look at things like the vertical jump or broad jump, Olympic lifting, kettlebell swings, or snatches as examples of ways to express and train power physically. Would you connect patience to these?

Patience is the key to power

I am willing to guess that you may connect patience as something that comes in handy when dealing with many other areas of life—like money, relationships, children, or traffic. But perhaps you have not yet considered it in relation to physically expressing power. However, I have found patience to be a key component to physical power—and when you lack patience you can have difficulty expressing your power.

The Elements of Perception and Proprioception

Before we dive further into patience, let’s look at visual perception and proprioception as factors to consider in regards to patience as an element of power.

Perception is a powerful thing (pun intended). How we “think” something should look, feel, and be can significantly influence what that thing turns into. According to Holly DeLuca, M.Ed., Special Education, “Visual perception is the ability to see, organize, and interpret one’s environment.” Take this image, for example:

Visual Perception

The two lines are actually the same length. Did you see them as being the same length when you first glanced at them? This is one aspect of visual perception. For more information on the theories of processing information about our environment please see this article: Visual Perception Theory. And for more information on visual processing please visit this page on Vision and Learning.

So what impact could perception have on learning something like patience in a kettlebell swing or jerk? Well, are you sure the student “saw” what you showed them? They may look at the above image and process line B as longer. They may watch you swing a kettlebell and see a slightly different movement than the next student. The demonstration of a jerk may appear to have much larger movements to one student and another will see very short movements. So even though you demonstrated a “perfect” swing or jerk, did the student see that? Or did they process that movement in a different way?

Then, you have to consider how the student interprets the movement and orientation of their own body through proprioception. The American Heritage Science Dictionary defines proprioception as, “the unconscious perception of movement and spatial orientation arising from stimuli within the body itself.”

Does the student “feel” the delay in the hip hinge from the top of the swing? Can the student “feel” the difference between sitting down into the hips one or two inches deeper versus leaning over at the torso one or two inches deeper? A good sense versus a poor sense of “where we are in space” can significantly influence how something like a swing or a jerk turns out for the student.

Patience is the key to power

The student will combine their perception and proprioception to create a concept of what the “thing” you are asking them to do “is.” If the student “sees” a very fast movement, then they may try to do it even faster based on “seeing it fast” and their own proprioception telling them they are not doing it fast enough. The concept of the “thing” they are being asked to do may be different than the reality you were attempting to convey.

This is where the use of slow-motion drills can be a game changer.

Why Patience Is the Key to Power

Dr. Mark Cheng, Senior SFG, has a brilliant quotation about slow movement: “Slowness is the mother of all good movement.” Deadlifts and slow motion jerks are two excellent drills that can enhance perception, proprioception, and patience for kettlebell swings and jerks.

But wait, weren’t we supposed to be talking about power? How can “slow” be good?

We crawl before we walk and we walk before we run. Speed is, or should be, the last variable added to an equation. If you don’t believe me, then go teach a fifteen-year-old to drive and just tell them to go as fast as they can as soon as they get in the car.

Not going to do that?

I didn’t think so.

I think in that situation you’d want the new driver to learn at an appropriate speed (i.e. slow) and add speed as appropriate. Let’s treat learning the kettlebell swing and jerk the same. Exercise your patience.


As you can see in the video above, the deadlift sets the foundation for the swing and is performed as a slow motion lift. “Don’t swing your deadlifts!” Deadlift your deadlifts. Have the patience to set your bottom position and find you wedge and push through the ground to the top. Have the patience to keep the arms against the ribs on the way down to perfect finish. Similarly, note the slow-motion unweighted patterning of the swing: keep the arms against the ribs to the hip extension and have the arms “popped” off the body to enjoy the float, then have the patience to wait for the arms to reconnect to the ribs before hinging again into the hike. Have a pattern before you add speed to it.


In the jerk video, you see what appears to be a ridiculously slow-motion example. People often struggle with the jerk because the pieces get lost in the speed of the whole. Allow the time to appreciate the pieces—the dip, drive, and dip to lockout. Have the patience to dip slowly enough to keep the upper arm connected to the rib. Have the patience to stay connected to a full hip extension. Enjoy the float of the kettlebell to just above head level so the second dip is smooth and efficient to lockout. Patience.

Then you can add speed.

For swings apply this concept and drill: do not focus on how many swings you can do in thirty seconds but rather how few swings can you do in thirty seconds. To put it another way, I don’t care how fast you can do ten swings, but rather how long it can take you to do ten swings. Have the patience to enjoy each rep, as well as the pieces and moments within the rep.

Remember slow is smooth and smooth is fast. Have patience and you will find slow becoming smooth and smooth becoming fast.

The post Patience: The Unexpected Key to Power appeared first on StrongFirst.


How to Prepare for, Pass, and Get the Most Out of the SFL

$
0
0

The SFG is StrongFirst’s most well-known certification, and is widely considered the gold standard for kettlebell certification. But StrongFirst is more than kettlebells and the SFG. As students of strength, we learn to use multiple tools to achieve our goals, including one perhaps most vividly identified with strength: the barbell.

The StrongFirst Lifter Certification (SFL) is the barbell counterpart to the SFG. Like the SFG, the SFL is a rigorous weekend of training and evaluation that requires serious preparation. And, like the SFG, one of the biggest challenges for participants can be figuring out how to prepare for the SFL. This article is meant to serve as a guide to help you develop a plan to be ready for and get the most out of your SFL experience.

SFL Certification

Why the SFL?

Why take the SFL at all? Here are a few possible reasons:

1. You are an SFG who wants to expand your understanding of the StrongFirst methods and philosophy.

StrongFirst’s methodology can be applied to more than kettlebell lifting. Many SFL attendees have noted that the understanding of programming and technique they gained at the SFL not only helped their barbell lifts, but also improved their kettlebell skills. If you want to understand the StrongFirst system in-depth, the SFL is a must.

2. You are a personal trainer who wants to incorporate safe, effective barbell training into your coaching.

It is possible to become an SFL without being an SFG (more on that below), and for some trainers, barbell training may be the more practical option. Kettlebells, while becoming more common, can be difficult to find, particularly in commercial gyms. Barbells, on the other hand, are available in almost any gym that allows even moderately serious strength training.

3. You already coach and use barbells in your training, but want to go more in-depth with your technique and programming.

If you are already familiar with the barbell, the SFL will help deepen and expand your knowledge of coaching, programming, and practicing the major barbell lifts. These are principles that can be applied to any coaching program, whether you are in a powerlifting gym, CrossFit box, or your local YMCA. Good training is good training.

The SFL is an in-depth look at barbell training, with a focus on seven major lifts: bench and military press; front, back, and Zercher squats; and the good morning. If that sounds like something that would make you a better coach, then the SFL is for you.

SFL Certification

The Prerequisites for the SFL

The SFL stands out as the only StrongFirst Certification that requires specific prior training before attending the course. The rationale is simple—the SFL is a firehose of information, all of which is built on the foundation of StrongFirst principles. If you don’t understand those principles, you’re unprepared for the SFL.

The first option is to attend an eight-hour StrongFirst Kettlebell Users Course. That course will introduce you to the fundamental principles of StrongFirst, and is an appropriate option for those who are unlikely to make greater use of kettlebells in their own training or coaching.

The second option is to earn your SFG Level I Certification. This is the more arduous choice, but will ensure that you have a deeper understanding of the StrongFirst methodology and philosophy. If you use kettlebells extensively, this is the superior option—and the SFG Level I is a Certification you will want anyway.

The SFL Strength Tests

The SFL begins with two strength tests: a bench press and a deadlift. All of the test lifts are based upon your bodyweight, which is rounded up to the nearest five pounds. That means the difference between you weighing 174 pounds and 176 pounds can turn into as much as ten additional pounds on your deadlift. That may not sound like much, but it can be enough to tip the balance against you. If you feel like you need to take care of your weight, start early.

Test 1: The Bench Press

The first lift tested in the SFL is the bench press: men must press 1.25x bodyweight for a single rep. Women must press 3/4 bodyweight, again for single. Challenging weights, but not out of reach for most lifters.

For many SFL attendees, the weight is not the greatest challenge. It is the structure of the test that dooms them to failure. You cannot lie down on the bar, grab the weight, bounce it off your chest, and call it a day. You must unrack the bar, wait for a press command, bring the bar to your chest, pause, press the bar, then wait for the rack command. Not waiting for the proper commands seems to be the number one reason people fail the bench press test.

How do you avoid this? Practice! In the test, you will be given the option of accepting a lift-off or not. You will also have the option of receiving a press command or not. Whichever way you prefer, practice your choices in advance. If you want a lift-off and press command, then have your training partner give you both during training.

Note: The press command is given when the bar is motionless on your chest. If you are not going to opt for a press command, make sure you are practicing pausing at the bottom of your press and at the top. If you slam the press up, but rack it before the command is given, you’ll fail the test.

SFL Certification

Test 2: The Deadlift

Like the bench press, the deadlift strength test is a single rep. Double bodyweight for men, one-and-a-half times bodyweight for women. Again, challenging, but not insurmountable.

This test is more straightforward: there is a “down” command given at the top of the deadlift, but pausing at the top of the lift seems more instinctive for most people. You must set the bar down under control, so don’t get used to dropping it. Your hands need to follow the bar down.

You will need to wear long socks while you’re deadlifting. If you have not done this before, again, practice. It’s a little thing, but the little things can be what throws you off. The first time you try lifting in your spiffy new compression socks shouldn’t be the day of the SFL.

SFL Certification

How to Prepare for the SFL: Get a Coach

Offering specific programming to prep you for these strength tests is beyond the scope of this article. If you need help designing a program, seek a qualified coach, or look at some of the programs listed at the end of this article.

In fact, getting a coach is the single biggest thing you can do to make your SFL prep easier. A coach who has earned the SFL already is an ideal choice, but a good powerlifting coach will also serve. You want someone who understands the technique of lifting, and who will be able to help you not only get stronger, but develop technical skill, as well.

The Weekend Itself

Once you’re done with the strength tests, the learning commences. Three days of barbell lifting, with four programming lectures, and a lot of physical practice.

Make sure your mobility is dialed in, especially for the squats and the military press (this will also be important when technique testing comes). Your hips, shoulders, and thoracic spine will be important areas, but make sure you’re covering all your bases. If you can, get an FMS done ahead of time, and deal with any major restrictions.

Do not neglect strength endurance work. It’s easy to look at the SFL requirements and assume the course is about max effort lifts all day. While it’s true that barbell lifting is a great way to build maximal strength, the reality is you’ll be doing a lot of lifting over the weekend. Without some strength-endurance work, the weekend can be brutal. Fortunately, you’ll have already learned the fundamentals of kettlebell work (either in your Kettlebell Users Course or SFG Level I Certification), and the kettlebell is a great tool for developing strength-endurance. Do not ignore your kettlebell while prepping for the SFL.

As noted earlier, there are four programming lectures spaced out throughout the weekend. This is a lot of information, but also a great opportunity to ask questions and get feedback. If you have specific concerns or questions about barbell lifting, bring them, and plan to take notes.

Be prepared to help your training partners. Chief SFL Doc Hartle often reminds attendees that this is an instructor certification. Practice instructing. Don’t just hang out and watch your partners struggle.

SFL Certification Prep

SFL Technique Testing

At the end of the SFL, you will be tested on three lifts: military press, back squat, and deadlift. Practice these lifts in advance. All of these tests are done for five (not one) repetitions. Yes, you will get adjustments and coaching throughout the weekend, but coming in with a blank slate is going to make the lifts much harder.

  • Military Press: Men must press 2/3 bodyweight, women 1/2 bodyweight, rounded up to the nearest 5lbs. You will be given a press command to start, and a count at the top of each lift. Get used to pausing with the bar locked out overhead. This is a place where mobility restrictions will really hurt you, so make sure you’ve cleared those up.
  • Back Squat: Men must squat bodyweight, women 3/4 bodyweight, rounded up to the nearest 5lbs. Again, you will be given a count at the top. Get used to pausing there (no pause at the bottom is needed). Also, make sure you’re hitting depth (below parallel). The weight on these is relatively light compared to the other test lifts, but again, mobility restrictions will doom you.
  • Deadlift: Men must deadlift 1.5x bodyweight, women bodyweight, rounded up to the nearest 5lbs. If you can pass the strength test, you are strong enough to make this lift, but it is five reps. Make sure you take some time during your preparation training to practice doing five good reps in a row.

These last three lifts are technique tests, which means you will be judged closely on your form and performance. You’ll get a lot of great feedback over the weekend, but if you can do some work in advance, it will be much smoother for you.

Some General Survival Tips

  • Bring food and water. The SFL is not as grueling as the SFG, but they are still long days and you will be lifting a lot of weights.
  • You will have breaks. Use them wisely. Learn what you can about the location in advance, and either find a good place to eat or bring your own food.
  • Doc Hartle likes Guinness and chocolate chip cookies. Just saying.

Resources to Prepare for the SFL:

Click here for more details and the upcoming schedule of SFL Certifications.

The post How to Prepare for, Pass, and Get the Most Out of the SFL appeared first on StrongFirst.

Adjust Your Sails (and Your Stance) with the Lock and Rock

$
0
0

“When you can’t change the direction of the wind—adjust your sails.”—H. Jackson Brown, Jr.

There are things in life we cannot change. Death, taxes, weather, or the way the wind is blowing. But there are things we can change. Our attitude (those of you with teenage children just laughed, I know), our furniture arrangement, our clothes—you get the idea. But as the Serenity Prayer reminds us, we need to know what we cannot change and what we can change, and not only know which is which, but accept those things we cannot.

The H. Jackson Brown, Jr. quotation above tells us that sometimes “adjusting your sails” is the key to handling things in life. This means adjusting ourselves to the challenge at hand. But while a shift in perception can be powerful, there are times when it isn’t the wind or our attitude that is getting in the way—sometimes we encounter a hard block. A hard block might be wanting to go to the beach, but you live nowhere near a lake or ocean. Or a hard block might be thought of as the classic “trying to fit a square peg into a round hole.”

Deep Double Kettlebell Squat

We want to bring this perspective to your structure and exercise. One of the things we cannot change is our anatomical structure. Short of going back and picking different parents or drastic surgical procedures, our structure is our structure. And, wow, is there variation from one of us to the next!

Today, I want to focus on one particular area of our anatomical structure and the impact of variations. I am going to suggest a way to individualize foot position for symmetrical stance exercise (swings, squats, etc.) because sometimes we need to “adjust our sails.”

Why Not Adjusting Our Sails Can Mean Failure

Because we tend to follow rules or because our perception of what we “should” be doing is set in a particular direction, we can all end up trying to fit that square peg into a round hole. I know I did in the past. My hip structure has a high alpha angle (a measure of when the femoral head changes shape—anything over 49 degrees is considered clinically significant). This structural reality means I should adjust my sail—I mean, stance—to accommodate. (For more detail, read the article I wrote for Functional Movement Systems entitled Why Movement Screening and Exercise Play by Different Rules.)

Adjust Your Sails (and Your Stance) with the Lock and Rock

The problem with not stopping to adjust our sails is that we can unknowingly be persisting in movements that may eventually cause us issues. With the hips in particular, two things can happen pretty easily when we fight our structure:

  1. Damage to the hip. A 2004 study published in Clinical Orthopaedics & Related Research, demonstrated that 87% of hip labrum tears were associated with at least one structural anomaly and a 2008 study published in Current Reviews in Musculoskeletal Medicine found that up to 74% of people with a labrum tear did not display a clear mechanism of how their hip was hurt. But as I laid out in my FMS article and has been well reported in many studies, findings on imaging do not necessarily correlate with pain and injury. What imaging did for me was confirm my structure and allow me to adjust to it instead of fighting it.
  2. When the hip stops the back starts. As Dr. Stu McGill has discussed, when your hip cannot go beyond a certain range due to a structural block, your body will likely make up the difference from another area—and the lower back is a frequent victim.

Given this information, what we want to do is optimize hip motion to enhance spine stability. Enter the Lock and Rock.

How to Do the Lock and Rock

  1. Begin standing in a symmetrical stance with the feet about hip width apart and feet facing pretty straight ahead.
  2. “Lock” the glutes in (squeeze the cheeks as hard as you can) and unweight the front of the foot (the “tock”) so your foot can spin/turn out on the heel.
  3. It is critical here that you allow your feet to turn out as much as they want to. Being in socks on a hard wood floor or on a slide board with booties on are ways to make sure the feet turn out as they wish to.

Take a moment to go do this.

How far did your feet turn out? Ten degrees? Twenty degrees? Did they both turn out the same amount? If one foot turns out further, I recommend first trying to match your feet to the greater degree of out-turn. See if that works for you. You may wind up with slightly different foot positions in your left and right foot.

Once you determine this stance, try it in your kettlebell deadlift and see if you are able to achieve the kettlebell deadlift position more easily. Groove the new stance in the deadlift, and then try it in your swing and squat. Are you able to keep your spine in position better or get deeper? Take a video of yourself or have a training partner watch you so you can analyze your positions.

Adjusting the foot position so the hips “set the feet” allows you to have the best chance to optimize your hip motion. Being able to efficiently move from the hips should make it easier to hip hinge and squat with better spine position and strength/power. If you or a student struggle to find the bottom position of the deadlift or squat with a stable spine, try individualizing the foot position to see if it gets you out of trying to fit the square peg in the round hole.

Kettlebell Swing Stance

Individualize Your Sails

I always used an out-turn in my stance and only ran into problems when I started going away from this natural out-turn and doing what I thought I “should” be doing according to some people’s version of the rules.

The reality of using the out-turn is the need to stretch the hip so we don’t get “stuck” in the out-turn (as much as our structure will allow us to stretch away from this). Therefore, kettlebell windmills and the 90/90 stretch from Simple & Sinister can be important tools. While we can’t change our structure we can “move with it” and try to achieve as much of a balanced ability to move by individualizing the foot position but also being mindful of “doing the opposite” to balance out the movements as much as possible. The idea of balancing out pressing work with rowing or pulling work is a good analogy here.

Give the Lock and Rock a try to see if individualizing your foot position to “fit” your hips assists you in better symmetrical stance exercise. As always, if using a new technique causes any issues at all you should stop and work with a healthcare practitioner (especially in the case of pain) to evaluate your hip(s).

References:
1. Groh MM, Herrera J. “A comprehensive review of hip labral tears.” Curr Rev Musculoskeletal Med. 2009; 2:105-117.
2. Wenger, D., Kendell, K., Miner, M., & Trousdale, R. “Acetabular Labral Tears Rarely Occur in the Absence of Bony Abnormalities.” Clinical Orthopaedics & Related Research. 2004; 426, 145-150.

The post Adjust Your Sails (and Your Stance) with the Lock and Rock appeared first on StrongFirst.

Fall 2016 TSC Results

$
0
0

Recap

Ladies and Gentlemen, the Fall TSC results are final!

Thank you to everyone who took part in this very unique day of worldwide strength, spirit, and camaraderie—and a special thanks to all of our hosts and judges across the globe. This could not happen without you guys.

And, we would like to especially welcome all of our first-time participants. We hope you’re hooked. ;]

Our Women’s Novice division is once again the category with the most competitors, and for many (if not most) of them, this TSC was their first-ever strength competition of any kind. There was a strong showing in the Men’s Novice category, as well, and as a reminder, all Novice category WINNERS must graduate from the Novice category in all future TSC competitions, and enter in the Open, Elite, or Masters (if qualified by age).

TSC Results Derek Toshner
It’s Derek’s world, we’re just living in it.

TOP COMBINED SCORES IN EACH CATEGORY

And so now, let us acknowledge the highest combined scores in each of the ten categories. For full rankings and results, please visit the leaderboard HERE.

Women’s Novice

1st: Toni Coetzee, The Yard Athletic, Fourways, South Africa
Snatches 166, FAH 79 sec, Deadlift 299.8

2nd: Catherine Burns, Hybrid Fitness, Moira, United Kingdom
Snatches 146, FAH 92 sec, Deadlift 281

3rd: Yolanda Jordan, The Yard Athletic, Roodepoort, South Africa
Snatches 143, FAH 73 sec, Deadlift 291

Women’s Novice 16kg

1st: Caoimhe Morgan, Fionn’s gym, Belfast, Northern Ireland
Snatches 137, FAH 79.3 sec, Deadlift 330.6

2nd: Erin Koeck, TNT Fitness, Fon du Lac, Wisconsin
Snatches 141, FAH 34 sec, Deadlift 345

3rd: Jeni Hayes, Charleston Kettlebell Club, Charleston, South Carolina
Snatches 136, FAH 40 sec, Deadlift 305

Women’s Open 12kg

1st: Wynne Chow, Box 33, Perth, Australia
Snatches 140, Pull-ups 12, Deadlift 265

2nd: Jenny Foster, Queen City Kettlebell, Cincinnati, Ohio
Snatches 145, Pull-ups 7, Deadlift 260

3rd: Stephanie Mills, Spindle Fitness, Chicago, Illinois
Snatches 132, Pull-ups 15, Deadlift 255

Women’s Open 16kg

1st: Kaz Searle, Box 33, Perth, Australia
Snatches 136, Pull-ups 14, Deadlift 330.7

2nd: Valerie Hedlund, Pacific Strength Kettlebells, San Clemente, California
Snatches 129, Pull-ups 17, Deadlift 300

3rd: Bruna Brito, Fit 2 Recover, Salt Lake City, Utah
Snatches 136, Pull-ups 12, Deadlift 275

Women’s Elite

1st: Vickie Moses, Latitude 44 Fitness, Wanaka, New Zealand
Snatches 131, Pull-ups 19, Deadlift 286.6

2nd: Ivy Perkins, MVMNT Gym, Marietta, Georgia
Snatches 119, Pull-ups 10, Deadlift 325

3rd: Cori Knuth, TNT Performance, Brookfield, Wisconsin
Snatches 117, Pull-ups 9, Deadlift 290

Women’s Masters

1st tied: Elizabeth Arndt, Omaha Elite Kettlebell, Omaha, Nebraska
Snatches 148, Pull-ups 3, Deadlift 275

1st tied: Patrice Pollock, Mvmnt Gym, Marietta, Georgia
Snatches 151, Pull-ups 6, Deadlift 235

3rd tied: Mandy Flanigan, Old Glory Iron Lion Kettlebell Club, Leesburg, Virginia
Snatches 138, Pull-ups 13, Deadlift 210

3rd tied: Kari Michael, The Phoenix Gym, Salt Lake City, Utah
Snatches 137, Pull-ups 5, Deadlift 225

Men’s Novice

1st: Blake Christensen, Iron Maltese Athletics, Chanhassen, Minnesota
Snatches 147, Pull-ups 24, Deadlift 500

2nd: Andy Williams, Unaffiliated, Winston Salem, North Carolina
Snatches 130, Pull-ups 22, Deadlift 505

3rd: Vladan Vitas, Gulliver Fitness, Solin, Croatia
Snatches 144, Pull-ups 18, Deadlift 485

Men’s Open

1st: Noah Maxwell, Max-Level Fitness, Wynnewood, Pennsylvania
Snatches 154, Pull-ups 23, Deadlift 565

2nd: Dangerous Dave, Box 33, Perth, Australia
Snatches 136, Pull-ups 32, Deadlift 540.1

3rd: Aldo Albericio, Palextra, Ravenna, Italy
Snatches 134, Pull-ups 24, Deadlift 573.2

Men’s Elite

Derek Toshner is STILL UNDEFEATED:

1st: Derek Toshner at TNT Fitness Results, Fon Du Lac, Wisconsin
Snatches 131, Pull-ups 23, Deadlift 600

2nd: Adam DeMarais, unaffiliated, Urbandale, Minnesota
Snatches 109, Pull-ups 16, Deadlift 605

3rd: Jay Hunter, Mavrx Training, Longwood, Florida (late entry)
Snatches 103, Pull-ups 18, Deadlift 540

4th: Johnny Kipp, Queen City Kettlebells, Athens, Ohio
Snatches 101, Pull-ups 10, Deadlift 610

Men’s Masters

1st: Steven Horwitz (also the Spring 2016 Winner, and improved both snatches and DLs) at his garage in Rockwall, Texas
Snatches 130, Pull-ups 18, Deadlift 490

2nd: Greg Havlik, Crossfit Chan, Chanhassen, Minnesota
Snatches 154, Pull-ups 21, Deadlift 375

3rd: Kelly Glad, Fit 2 Recover, Salt Lake City, Utah
Snatches 115, Pull-ups 14, Deadlift 405


Congratulations to all of you!

SPRING 2017 TSC SCHEDULED FOR APRIL 8. MARK YOUR CALENDAR!

The post Fall 2016 TSC Results appeared first on StrongFirst.

Spring 2017 TSC Results

$
0
0

Ladies and Gentlemen, the Spring 2017 TSC results are final!

Thank you to everyone who took part in this very unique day of worldwide strength, spirit, and camaraderie—and a special thanks to all of our hosts and judges across the globe. This could not happen without you guys.

As StrongFirst’s VP of Marketing, I was able to fly out to one of the largest TSC events, and the host site of our (still undefeated) Elite Champion Derek Toshner—his brother and fellow SFG Team Leader Ryan Toshner’s place at TNT Performance in Brookfield, WI.

As is common at the Tactical Strength Challenge, regardless of location—virtually every competitor (photo below) pulled a PR lift that day, with many PRing in all three. We had three ladies that drove three hours each way to participate (thanks, guys), and also competing that day were many folks (of all ages) for whom this Spring 2017 TSC was their first-ever strength competition experience. That is what we love about this event!

Spring 2017 TSC

There are dozens and dozens of inspiring photo and video posts on Instagram from this TSC, and we encourage you to check them out here: #tacticalstrengthchallenge, as well as on Facebook’s Tactical Strength Challenge page. We’d share a few of them here but honestly it’s impossible to choose. We’re just very happy that so many of you had such a great time.

A Word About TSC Scoring

The reason we require an SFG Instructor as a host judge is because we need some way to help ensure that judging standards have an acceptable level of consistency, based on a shared experience and understanding of safe and complete execution. Even with this requirement, judging challenges arise.

It is for this reason that we have initiated some new rule clarifications, as well as a video review for any potential top-ten finisher in each division. StrongFirst Chief Instructors along with additional SFG Leadership were responsible for reviewing these videos, and for adjusting the counted reps/attempts where necessary. If counted reps were called into question, both the athlete and the event organizer were contacted to discuss it.

While this is a fairly labor-intensive process and does delay the publication of the final results, and while the true spirit of the Tactical Strength Challenge is a competition not with your fellow athletes, but as a challenge to improve yourself and your own lifts, it will always be important to us that consistent judging takes place. We will continue to do everything we can toward this end, for every TSC ongoing.

Shirts

Competitors: If you wish to purchase an additional shirt, we have a very limited quantity available HERE (and once they’re gone, they’re gone).

Top Combined Scores in Each Category

And so now, let us acknowledge the highest combined scores in each of the ten categories. For full rankings and Spring 2017 TSC results, please visit the leaderboard HERE.

Women’s Novice

1st: Sabrina Marthaler Hoppe, Noonan Sport Specialists
Snatches 164, FAH 90 sec, Deadlift 270

2nd: Dorthy Lola Sumruld, Primitive Strength
Snatches 150, FAH 105 sec, Deadlift 260

3rd: Kety, Power Body
Snatches 175, FAH 64 sec, Deadlift 298

Women’s Novice 16kg

1st: Tina McDermott, Hybrid Fitness
Snatches 135, FAH 117 sec, Deadlift 314.15

2nd: Vanessa Kenyon, Hybrid Strength
Snatches 132, FAH 67.87 sec, Deadlift 336.2

3rd: Karen Lawler, Velocity Strength & Fitness
Snatches 130, FAH 61 sec, Deadlift 315

Women’s Open 12kg

1st: Nicola Few, Hybrid Strength
Snatches 146, Pull-ups 10, Deadlift 253.53

2nd: EllieJane78, Banks O Dee
Snatches 142, Pull-ups 8, Deadlift 280.5

3rd: Jackie Olson, Local Gym
Snatches 139, Pull-ups 15, Deadlift 250

Women’s Open 16kg

1st: Jackie Michaels, TNT Fitness Results
Snatches 158, Pull-ups 13, Deadlift 370

2nd: Noriko Kariya, Wu-Tang Clan
Snatches 142, Pull-ups 15, Deadlift 330

3rd: Val Hedlund, Pacific Strength
Snatches 137, Pull-ups 21, Deadlift 320

Women’s Elite

1st: Hyunjin Choi, Powerzone
Snatches 122, Pull-ups 11, Deadlift 363.7

2nd (tied): Vix Sharp, Hybrid Fitness
Snatches 116, Pull-ups 11, Deadlift 319.67

2nd (tied): Erin Koeck, TNT Fitness Results
Snatches 117, Pull-ups 0, Deadlift 370

Women’s Masters

1st: Patti Opalacz, TNT Fitness Results
Snatches 153, Pull-ups 7, Deadlift 300

2nd: Michele Payne, Breakthrough Strength & Performance
Snatches 153, Pull-ups 3, Deadlift 307.2

3rd: Salwa Flewell, ProjectMove
Snatches 140, Pull-ups 11, Deadlift 235

Men’s Novice

1st: Dennis Koester, TNT Fitness Results
Snatches 146, Pull-ups 25, Deadlift 475

2nd: Stef S, Box 33
Snatches 148, Pull-ups 22, Deadlift 462.9

3rd: CJ, The Sect
Snatches 147, Pull-ups 20, Deadlift 435

Men’s Open

1st: Mike Wagner, TNT Fitness Results
Snatches 160, Pull-ups 24, Deadlift 615

2nd: Aldo, Palextra
Snatches 141, Pull-ups 24, Deadlift 573.2

3rd: Tim Barrett, Sky
Snatches 149, Pull-ups 22, Deadlift 550

Men’s Elite

Derek Toshner not only ranked first in overall Elite Division scores yet again, but also ranked first in EVERY individual category. Incredibly impressive.

1st: Derek Toshner at TNT Fitness Results, Fon Du Lac, Wisconsin
Snatches 137, Pull-ups 22, Deadlift 635

2nd (tied): Maverick, Mavrx Training
Snatches 102, Pull-ups 21, Deadlift 550

2nd (tied): Noah Maxwell, Max-Level Fitness
Snatches 127, Pull-ups 19, Deadlift 565

Men’s Masters

1st: Michael Knight, Art of Strength
Snatches 144, Pull-ups 16, Deadlift 415

2nd: Brian Guensler, Equinox
Snatches 128, Pull-ups 13, Deadlift 530

3rd: Mark Merchant, As One
Snatches 131, Pull-ups 16, Deadlift 385


Congratulations to all of you!

FALL 2017 TSC SCHEDULED FOR OCTOBER 28—MARK YOUR CALENDAR.

The post Spring 2017 TSC Results appeared first on StrongFirst.

A Hip Hinge Program to Help You Generate Deadlift and Swing Power

$
0
0

Nobody got bull strong who wasn’t tough. “There is no hard body with soft hands,” I’ve heard. While grit is part of the game, let’s also be diligent about making sure our work ethic isn’t hiding the subtle roots of injury.

As you move from a beginner to an intermediate lifter, a few things change. You’re working with weights and volumes heavy enough to warrant smarter programming. Relative strengths, areas for improvement, and goals must be accounted for and balanced in each mesocycle. The program choices here are endless.

To prevent plateaus or injury down the road, take stock of which lift might need some fine tuning and focus your efforts before it becomes a liability. We are looking at the deadlift here, but the same principles could be applied to the squat or press.

A Hip Hinge Program to Help You Generate Deadlift and Swing Power

Heavy Doesn’t Have to Be Slow

For the strength athlete, the deadlift is the simplest, and often the heaviest, lift of all. It’s a barometer of your strength, physiological state, and structural integrity. Unfortunately, it’s easy to grind past the point of high-quality reps, allowing less optimal movement habits to take hold.

If your deadlift is sluggish, stuck, or just feeling “off,” it’s time to change gears.

The goal of this program is not necessarily to set a new 1RM, it’s to re-tool and potentiate your hip hinge for safer, stronger reps. We are concerned with building, not testing, by doubling-down on trunk stability, training deadlift variations, and focusing on speed reps.

As Brett Jones said, “You can PR without maxing.”

Quality over quantity.

The Hip Hinge Program

Every day starts with a breath-focused sequence to prime the hips and core.

Daily Warm-up:

  1. 90/90 Breathing x 2 Minutes
  2. Glute Bridge x 1 Minute
  3. Bottoms-Up Hip Flexor Stretch – 2 x 20s each
  4. Dead Bug x 2 Minutes
  5. Stationary Split Squat x 5 each

The 90/90 breathing drill is influenced by Dr. Quinn Henoch of JTS Training and Chad Wesley Smith, who credits much of his recovery from a major back injury with this type of movement prep.

Our breath can limit or unlock our potential. Specific to the deadlift, the breath should help set the hips in the most advantageous position while bracing the spine. When practicing breathing drills for a lifting application, don’t stop with an inhalation into the “belly,” but continue into the lower back, chest, and upper back. Such practice gives you a reverse belt, of sorts, generating tension from the inside out through the entire torso.

Take the same focused attention on the breath to the remaining drills. After the warm-up, you’re ready to apply those breathing and core bracing skills to the bar.

A Hip Hinge Program to Help You Generate Deadlift and Swing Power

In this program, the hip hinge is trained three times per week, with two speed-oriented days (one with heavier top sets) and a swing day. Here is an outline of the four training days:

  • Day 1 is trained with the opposite deadlift stance that you compete or are most strong with. If your conventional and sumo maxes are very close, then lucky you—choose either variation. If you must stay with your preferred stance due to injury or other issues, consider pulling from a one- or two-inch deficit. A new stance maybe just the right amount of variety the body needs to fill in the gaps of a lagging pulling pattern.
  • Day 2 is for front squats and whatever press is most important for you at the time. Front squats are recommended over back squats to limit the poundage and stress on the spine.
  • Day 3 is for the deadlift, but training your competition stance. The speed sets are basically warm-ups to the heavier singles that follow. Feel free to increase the speed set weights as you go, especially if there is a 75lb+ difference between your 60 and 75% numbers.
  • Day 4 is swing day. Use doubles of your snatch-size bell or 4kgs heavier. You may also swing two-handed with a single bell if you have one heavy enough.

Note that assistance exercises are predominantly core and row based, lest we forget the importance of the abs and lats in a good pull. The farmer’s walk is performed very slowly with weights that challenge posture but don’t unduly fatigue the grip. I call this Dr. Mark Cheng inspired variation the “ninja walk.”

A Hip Hinge Program to Help You Generate Deadlift and Swing Power

A Hip Hinge Program to Help You Generate Deadlift and Swing Power

A Hip Hinge Program to Help You Generate Deadlift and Swing Power

A Hip Hinge Program to Help You Generate Deadlift and Swing Power

Supersets are notated with A/B. For example, on Day 1 perform 10 swings, 3-5 pull-ups, rest and repeat four more times through.

Click here to download an Excel file of the entire program.

The Finer Points

You should be well versed in the skills of tension for grinds. As such, this is not an appropriate program for beginners. Using simple cycling and practice, build your deadlift to at least 1.5x bodyweight if you are a lady or 2x bodyweight if you are a gentleman.

Do not take “speed” to the point of trying to be ballistic with your deadlifts. Lighter weights allow you to practice constant acceleration through the pull, but do not lose tension. Master tightness before worrying about speed.

A few helpful deadlift tips to keep in mind:

  • Film your sets from the side. Ensure your form, no matter what speed, looks the same.
  • Squeeze the bar off the floor, pull with smooth and steady force.
  • Finish each set with a “static-stomp” and hold for three to five seconds. Imagine driving your feet through the floor with maximal pressure, reinforcing a strong lockout.
  • Practice low-arousal lifting. No music or psych ups.

A Hip Hinge Program to Help You Generate Deadlift and Swing Power

The Power of the Hip Hinge Program

Training to the edge of your ability on the deadlift may be tempting, but leaves you with little room to progress. Smart strength training is not a mad dash to add the next plate.

Take a cycle to truly cash in on the value that lies in owning submaximal weights. Nothing beats the feeling of smoking a deadlift that used to stick to the floor. Marry tension with speed and soon you’ll be asking, “Who turned down the gravity?”

The post A Hip Hinge Program to Help You Generate Deadlift and Swing Power appeared first on StrongFirst.

Absolute Strength Is the True Master Quality

$
0
0

For me, absolute strength is king. It has been and will continue to be my main obsession. Relative strength is impressive, but more important if you have a weight class. It is absolute strength that has the effect of allowing all other attributes to become greater.

Simply defined, absolute strength is the greatest amount of force that can be voluntarily produced regardless of time. It is also called maximal or limit strength.

If you have a goal other than limit strength, that is respectable. But what I am trying to do is shine a light on the differences between training for absolute strength and other attributes like power, strength endurance, stability, speed, static strength, and endurance.

Absolute Strength Is the True Master Quality

So what’s the difference? As with all journeys, your perspective and mindset determines the outcome. If you think to yourself, “I want to swing the Beast a thousand times in a workout,” then your goal is not absolute strength. It would be endurance or perhaps strength endurance. (A few of you may know that a couple of brave souls actually did just that. They swung the 48kg one thousand times in under an hour. Amazing, really.) On the other hand, if you think, “I want to increase the heaviest weight I can swing correctly,” then you’re thinking of absolute strength.

Getting your mindset for maximal strength is the first step. Staying committed to that decision is the next and possibly hardest step of all. At least, it has always been the hardest step for me.

How Do the Truly Strong People Train?

Everyone has worked with a student who wants to achieve ten goals at once. “I want to deadlift heavier, work on my Olympic lifts, play ball a few times a week, do plyometric training a couple times a week, train the kettlebell movements, and go to a yoga class with a friend.” Sound familiar?

To these people, I usually say, “Remember when it comes to training, you want your future to thank your past.” When it comes time to re-test your max press at the end of your program, hopefully you will be thankful for the weeks or months leading up to that max.

When you want to be as strong as possible, it is helpful to look at how truly strong people train. Competing strongmen and -women would be the purest display of limit strength. I mean, they are the world’s strongest men and women. Strongmen and -women essentially train directly for their events. Meaning, they train and compete in a deadlifting event, an overhead pressing event, a carry event, and possibly a squatting or pulling event. They train and compete in full body movements that test their limit strength.

Absolute Strength Is the True Master Quality

Powerlifters and Olympic lifters also both exhibit amazing absolute strength, but it is their relative strength that impresses the judges. That said, all three sports ask how much can your posterior chain actually do and all three also have an affinity for simplicity.

How you write your training program is going to be the best predictor of your progress. Here are some general guidelines when writing your program:

  • Use lifts appropriate for training limit strength: If it’s not a full-body lift, then it doesn’t qualify. Deadlifts, squats, bench press (you read that right), snatch, clean and jerks, get-ups, bent press, and farmer’s carry.
  • Use a rep scheme appropriate for strength: Sets between 1-5 repetitions are a keystone to great strength programming.
  • Take plenty of rest between sets: I suggest 3-5 minutes. Pavel’s new research may say even longer.
  • Schedule rest days: Rest means rest. Period.
  • Keep it simple: Focus on one or two lifts.

The simplest thing most people can do is to start deadlifting. Pavel told us this in Power to the People! After all, the deadlift allows you to lift the most weight. So, what better way to exploit the overload principle then with heavier weights? (I’m speaking of the barbell deadlift as is taught at the SFL Certification and not the trap bar or hex bar exercises that some will pass off as deadlifting, by the way.)

If you’re an advanced trainee, then I’m not talking to you. I’m talking to those of you who want to do hundreds of reps with light weights and minimal rest. All the while wondering why your press isn’t getting stronger.

Moving on, it doesn’t have to be deadlifts. It can be any full-body lift with which you feel comfortable lifting the heaviest weights. An example: Ike wants to train for his snatch test, but doesn’t want to add a significant amount of volume. So, what does he do?  He practices snatching bells one and two sizes bigger to increase his limit strength. With his new-found limit strength, the snatch test is hardly a test at all. Folks, it can be that simple.

Absolute Strength Is the True Master Quality

Don’t Forget Rest and Relaxation

Scheduling rest days into your program is key for long-term strength development. A rest day in my book is doing nothing more than living. Take a nap if you have time. Cook your favorite meal at home. Do whatever it is that helps you de-stress.A lot of people like active recovery between lifting sessions. That can be great, if it is actually recovery.

A simple method I’ve used in the past is to repeat a four-day set:

  1. Heavy lifting day (80-95%)
  2. General conditioning day
  3. Movement day
  4. Rest day

Simply repeat this four-day set. Get in tune with how your body feels and is recovering.

This by no means is the only way. Check out my Daily Dose Deadlift Plan for an example of the opposite in training frequency.

The Surprise of Absolute Strength

It never fails that when I go to a StrongFirst event two things happen. First, someone comes up to me and says, “You like to deadlift a lot.” Second, I am amazed when I realize how many people don’t deadlift regularly.

Yes, I do like to deadlift, but you know what I like more? I like having a strong back. I like having a punishing grip. I enjoy having healthy shoulders. I love having strong hamstrings so I can snatch heavier kettlebells.

It’s not about the deadlift. It’s about absolute strength.

To explicate my point, I’m going to tell you a true story. The story begins during registration for my first Kettlebell Certification. While I was nervously waiting for the events of the day, a sweet young lady named Ellen started a conversation with me. She asked if I was nervous. (It was pretty obvious, so I didn’t attempt to hide it.) I told her I had not worked with a coach and I was worried about the snatch test. She replied, “I haven’t touched a kettlebell in over a year.” I thought to myself, “This woman is crazy. What is she thinking?”

Later in the day, when Pavel brought her to the front and introduced Ms. Ellen Stein (SF instructor and Powerlifting World Record holder), it all made sense. Long story short, Ellen blew through weekend with ease. How do you think she did that? Two words: absolute strength. The strength she had gained from her powerlifting training was more than enough to carry her for the weekend. My mind was blown wide open.

That took place eleven years ago. Sadly, I still hear people talk about losing weight so they can certify with a lighter bell. Hey, if you need to lose weight for health reasons, then get it done. Otherwise, focus on methods that will increase your absolute strength. After all, we are StrongFirst and not LoseweighttoliftlighterweightsFirst.

Absolute Strength Is the True Master Quality

Conclusion

It may seem that I am making a case for deadlifting. Well, I’m not intentionally trying to—or maybe I am just a little. Either way, if you ask me for advice, then I’ll probably ask you, “How much can you pull?”

Hopefully, I have highlighted how important limit strength is for overall physical development. Even more, maybe I have influenced you to rethink your training methods. Most importantly, I hope this helps someone be more focused on reaching a higher level of absolute strength.

If you’re reading this, then you are on the right path. Keep pursuing your education in the best techniques to increase your absolute strength so you can perform your best at one of StrongFirst’s awesome Certifications or whatever other goal you’ve got your sights on.

The post Absolute Strength Is the True Master Quality appeared first on StrongFirst.

Deadlift: To Stop or To Go

$
0
0

Every time I teach the deadlift, a particular question comes up: whether to perform “stop reps” or “touch and go” reps during sets.

As I start to answer the question, I first explain the benefits and disadvantages of each approach. I then ask a few questions: What are your goals for the deadlift? What are you trying to accomplish with this movement?

With the explanation of these two styles of deadlift reps and the answers to the aforementioned questions, we can properly discuss which style the lifter should perform.

Deadlift: To Stop or To Go

But First, Why the Deadlift Is Different

Most movements start with an eccentric component immediately followed by the concentric portion. This helps to enable the stretch reflex phenomenon that assists the athlete in going from the eccentric to the concentric contraction in a split second. This, in turn, allows the athlete to come up with the weight in an efficient and expedient matter.

But the deadlift is a unique lift in comparison to most barbell movements. It starts with a concentric-heavy movement from the floor and finishes at the top, locked out in a vertical plank position. This is how the movement usually looks at most gyms that I go to.

But what about those who want to perform touch-and-go reps? How do they do that? And what does that change about the eccentric and concentric portions of the deadlift?

One of my answers to the question of “how” is technique. Both at the SFL Certification and in your own gyms, technique must be learned first. And second. And third. Once you have earned your technique badge, then it’s okay to bring in the touch-and-go rep (also simply known as “go reps” or “to go”).

So first, let’s discuss the “stop” deadlifts and then explain how the “go” deadlifts differ.

Deadlift: To Stop or To Go

Deadlift: To Stop

These are the deadlifts I have done for 90%+ of my training career. They make the most sense to me and they are the closest to what I do in my powerlifting career: walk up to the bar, set-up, pull it, lock it out, then use gravity to pull it down. If I am doing reps, then once the bar is on the floor, I set up for the next rep and hit repeat. That’s it!

Ah, but there is more! Here are what’s up with each rep:

  1. Each rep is its own rep. Meaning: From the point of view that the rep starts at the floor and finishes at the top, and with no eccentric lowering part to get the barbell back to the floor (let it fall!), this is true.
  2. Each rep has its own life. Meaning: Even though you are doing 5 reps, each rep is its own animal, from start to finish. The set-up, the pull, and the drop are all separate for each rep. Yet they combine to form a set when done.
  3. Each rep has its set-up. Meaning: Each rep has its own start, middle, and end. Prior to each start, there is a quick set-up, getting the body ready for the pull. This allows both the body and the mind to reach deep inside to get ready to pull the weight off the ground—each and every rep.
  4. Each rep can be modified from the previous one. Meaning: Every time you set-up for the next rep, you can change from what you did the rep before. For example, if you wish to change your grip on the bar, do it. If you wish to change your stance, do it.

Deadlift: To Go

These are the deadlifts I have done for <10% of my training career. Even though I don’t do them very often, they still hold a purpose for me, especially near the beginning of a powerlifting cycle. Usually my sets with these don’t exceed 5-8 reps and are done with approximately 70-80% of 1RM. Occasionally I will go as high as 85% of my 1RM, but that doesn’t happen too often.

When doing these, you walk up to the bar on the ground, get set-up, and pull to the top. At the top, instead of just allowing gravity to get the bar back to the ground, you do something different—you lower the bar in similar fashion as you lower yourself in the squat.

The bar speed will make a medium-speed descent to the floor, but instead of allowing the bar to land on the floor with all of the weight behind it, you simply touch the floor, and proceed on to the next deadlift, back up to the top. At the top, while loaded, take a breath while staying tight, brace, and lower the bar down to the floor, touch, and rise again.

Deadlift: To Stop or To Go

This type of deadlift is very similar to the barbell military press we do at the SFL: the first rep is a concentric-only lift, then the succeeding reps are eccentric and concentric style lifts. It differs from the “stop” deadlift in that you change the point at which you cycle movement. In the “stop” deadlift, you start each rep at the floor. In the “go” deadlift, once you lock out at the top of the lift, then that becomes your starting and end point.

Here is what is up with each rep:

  1. Each rep is part of a set. Meaning: You are supposed to do 5 reps. You do the first rep, lock it out, then proceed to touch the floor, and immediately come back up and lock it out again. Hit repeat until you are done with the fifth rep. After locking out the fifth rep, you can either set the weight down as fast as you wish (since the set is done) or you can set it down as if you were going to go right back up with it.
  2. Each rep needs to look like the rep before. Meaning: One of the bad things about go reps is that the first rep looks great, but with each succeeding rep, the form of the athlete gets worse. Don’t let this happen! Stay tight and focus on starting the rep from the top, not at the bottom.
  3. Each rep softly touches the floor. Meaning: Touch the floor softly before going back up. Touch the floor as if you were doing a touch-and-go bench press rep. Be gentle, and then be ready to explode on the way up!
  4. East rep has its own spinal component. Meaning: As the set moves forward, it will become harder and harder to maintain proper spinal alignment. This fact is one of the main reasons most people don’t do this style of deadlift. Keep your spinal alignment. Period.
  5. Each rep needs perfection. Meaning: Using this style of deadlifting means your technique needs to be spot on. Spend a long time with stop deadlifts before adding the go version to your training stable.
  6. Each rep adds to your volume, but that’s it. Almost. Meaning: When doing go deadlifts, please understand that if you will be training for a 1RM down the road, it will be very hard for you to extrapolate from your best 5RM go deadlift what your 1RM stop deadlift will be. This doesn’t mean you can’t use the go deadlift to train for a stop deadlift, but what it does mean is this —use the go deadlift as a tool at the early part of your training, get super strong with it, then move on to the stop deadlift. This is, of course, if you are training for an eventual 1RM or something like it. If that is not the goal, then use away with the go version!

Deadlift: To Stop or To Go

So, to Stop or to Go?

Using these two types of deadlifts is very important to your overall development. Whether you are an athlete getting ready for the rigors of competition or a 68-year-old student who wants to be able to pick up your grandchild, using the deadlifts as described above can help you increase your strength.

Each style has its own benefits and uses. It all depends on what your goals are and how you wish to achieve them. Remember, pull hard, pull often, and pull strong!

The post Deadlift: To Stop or To Go appeared first on StrongFirst.


How to Get Properly Loaded in the Deadlift and Swing

$
0
0

Not so fast—”getting loaded” means something completely different at StrongFirst.

Getting “loaded” means an active eccentric to the bar for a deadlift or active eccentric before the first hike of the kettlebell in a swing. And I’m sure you have some questions about all of this. So, let’s dive into the concept of getting loaded.

The Skill of Getting Loaded

There is an old Queensryche rock-opera album called Operation: Mindcrime where in the opening of one of the songs you hear someone yelling, “I’ve had enough and I want out!”

Wait, weren’t we talking about getting loaded—how did we get to late ‘80s hairbands?

Well, “I’ve had enough and I want out!” is my basic reaction when I watch deadlift videos where people reach for the bar first and then try to find their position, tension, and wedge for the lift. Watching a skilled powerlifter reach for the bar first and find the bottom position is a very different thing.

How to Get Properly Loaded in the Deadlift and Swing

But for those learning the lift, developing the skill of getting loaded can be a major source of issues. Starting your pull before you have the perfect position with your tension set and a good wedge between the ground and the bar is a recipe for rounded backs and trouble.

Pavel knew this and offered his advice on it all the way back in 2000. When he put out his book Power to the People, he advised to get tight at the top and pull yourself to the bar, and also to let go and reset for every rep. In addition, he advised sets of five and under. In the bodybuilding-based fitness culture of that day, it was a pretty revolutionary book.

Well, I read that book and started my deadlifting following its details of how to set up and reset for every rep. This led to my competition-best 573lb belt-only deadlift at a body weight of 198lbs in 2007.

So, what does it really mean when we talk about “pulling yourself to the bar” so you can “get loaded”? In short, it means we are creating an internal eccentric load to assist in the start of the deadlift.

Note: Eccentric action of a muscle is a contraction that happens as the muscle lengthens. Concentric action is when the muscle shortens as it contracts.1 The negative portions or lowering portions of an exercise are typically eccentric actions and positive portions of an exercise are typically concentric.

How to Get Properly Loaded in the Deadlift and Swing

When you contrast the deadlift with the squat or bench press, you see that the squat and bench press are loaded into the eccentric or negative portion of a lift (the downward portion, in the case of both those lifts) and then a positive or concentric is subsequently performed.

This is versus the deadlift where you start with the concentric portion of the lift. The eccentric load of the squat and bench press is a whole different skill to be mastered, but suffice it to say it, too, “loads the spring” for the concentric portion of the lift.

Said another way, we “get loaded” through an eccentric movement. Since the deadlift begins with a concentric movement, our approach and set-up is what provides us with the opportunity to create an eccentric load.

By the way: the kettlebell military press falls into the category of a concentric-first lift and that is why the clean that precedes the press is so important.

How to Get Loaded for the Deadlift

  • Stance: Be precise on your stance and position with the bar. Everything from your width of stance, angle of feet, and distance from the bar should be precisely the same every time you step up to the bar—period.
  • Tight from the Top: Pull the kneecaps up, tighten the glutes, sniff air into a braced abdomen, engage your lats by bringing your armpits and hips closer together, and flex your triceps. All of that should have you feeling like a solid block.
  • Pull Yourself to the Bar: Use all of that internal tension to create a “spring” that you have to compress down, and actively pull yourself to the bar against that tension.
  • Grab the Bar: Your hands should be aimed straight for the bar and grasping it should be easy.
  • Wedge: Drive your feet into the ground and try to wedge yourself under the bar to begin your deadlift. Louie Simmons’ advice to “feel equally loaded between your feet and hands” is excellent for getting the wedge started. The wedge also takes the “slack” out of the bar.

All of that begins your deadlift. Then, continue driving into the ground and extend the hips to the top. There, sniff more air into the braced abdomen and either perform a controlled eccentric to the ground or a controlled “quicker” lower (less tension, but not a drop). The bar should go straight down—not out and around your knees.

Breathing

Your breath is the key to setting the load. Notice in the video that when I get tight at the top, I perform a forced exhale to pre-tense the abs and body. Then, I sniff air into the braced abdomen and I sniff a bit more in at the bottom. This dials-in the intra-abdominal pressure to set the “cylinder” of the midsection to amplify strength and stability for the lift. All of this requires good, nasal, diaphragmatic breathing.

During the positive or concentric phase of the deadlift, you can either “power breathe” (do a forced exhale) to continue to squeeze even more tension and strength into the lift or (if it is safe for you to do so) you can perform a breath hold to the top. If you have questions on any of this, please speak to your doctor.

How to Get Properly Loaded in the Deadlift and Swing

Applying This Lesson to the Swing

Follow the same steps minus the arms going straight to the bar. In the case of the swing:

  • Get tight as described above with an appropriate stance for the swing.
  • Hinge first, then reach for the kettlebell without losing your position or tension.
  • Sniff in more air and hike the kettlebell to connect the arms to the ribs with lat engagement—and you are off and swinging. Don’t wait until the load of the kettlebell “hits” you to get tight at the start.

When it comes to breathing in the swing, the breathing here is rhythmical—sniff into a tight abdomen on the hike and force air out at the top.

How to Get Properly Loaded in the Deadlift and Swing

One Rep at a Time

I have said for years that if I could give the fitness world a gift, it would be to remove the “repetition mindset” and get students to focus on one rep at a time. That means thinking of a set of five as five sets of one, not one set of five.

This is a perfect mentality for the deadlift, where you are pulling yourself to the bar, performing your rep, letting go and resetting to the top without the bar, taking a breath, and repeating the process for every rep.

This ensures a perfect set-up for every rep instead of potentially pulling a second rep from a less-than-ideal position if you were to get pulled forward during the lowering of the bar.

Where Can You Learn More?

The SFL Certification is the barbell “campus” of the StrongFirst School of Strength. StrongFirst Lifter dives deep into applying the StrongFirst principles to the barbell lifts. And, as you can see with the connection between the deadlift and swing, the “campuses” of the School of Strength are consistent in our principles and carry over to each other.

So, get loaded for your deadlifts and swings!

References
1. Strength and Conditioning: Biological Principles and Practical Applications, 2011.

The post How to Get Properly Loaded in the Deadlift and Swing appeared first on StrongFirst.

How I Achieved a 3x Bodyweight Deadlift (and You Can Increase Your Deadlift, Too)

$
0
0

“As to methods there may be a million and then some, but principles are few. The man who grasps principles can successfully select his own methods. The man who tries methods, ignoring principles, is sure to have trouble.”—Harrington Emerson

A few years ago, my deadlift was at a crossroads. While combing through my training logs, I realized that accessory work and advanced programming weren’t helping me improve. Instead, whenever I added a new deadlift-related exercise or an extra day of lifting, my deadlift remained stagnant at best, and declined at worst.

This went against everything I’d learned from the Internet, which we all know is never wrong. Indeed, we’ve all met someone who improved his or her deadlift with hamstring curls, good mornings, or a fancy periodization model. There are also documented cases of someone using kettlebell swings to improve the deadlift, sometimes without ever touching a barbell—the WTH effect at its finest.

How I Achieved a 3x Bodyweight Deadlift

But what about me? Why wasn’t I seeing the progress I expected? Was the accessory work and programming overrated? Was all my extra work sapping my recovery? Or was I guilty of majoring in the minor and missing something big?

Confused and determined to find an answer, I decided on my course of action: I would use StrongFirst principles to guide a simplified approach to increase my deadlift.

The Plan to Increase Your Deadlift

This simplified approach meant deadlifting once a week, cycling between sumo and conventional every three to six months, and staying between 9 and 25 total reps each session. Most importantly, it meant simple programming. I wouldn’t be tempted by the next “Best Deadlift Program” I’d see on the web.

It also meant no traditional accessory exercises. No deficit deadlifts, speed deadlifts, rack pulls, good mornings, bent-over rows, hip thrusts, or progressive resistance like bands or chains. If my deadlift improved, it’d be through practicing the skill, not a drill.

That was in 2013 and my deadlift at the time was 350lbs, or 1.8-times my bodyweight.

Two months ago, I deadlifted 571lbs—that’s 3-times my bodyweight.

Of course, results not typical. But what were the StrongFirst principles I used and how did I incorporate them into my training? Here are three actionable tips anyone can use to improve deadlift performance:

Tip #1: Record. Every. Lift.

I can’t tell you where I first heard the saying, “The elite are just better at the basics.” But I can tell you it was definitely from a StrongFirst source, as it exemplifies the principle of quality over quantity and how the devil is always in the details.

I vividly remember the first time I saw my deadlifts on video. Embarrassingly, the real reason I was recording them was to see how great I looked. While the bar was moving, I hesitate to call that movement a “deadlift.” I wasn’t wedging at all, my hips were too low, the bar leaked away from my shins, and by halfway up I resembled Quasimodo. It didn’t measure up to StrongFirst standards and I’ve since hidden that video deep in my computer’s hard drive.

That experience prompted me to take video of every rep for the next few months, even the warm-ups. It was the best way to constantly reinforce my good habits while quickly breaking the bad ones. I thrived on the immediate feedback and it worked so well that I’ve continued to use it to refine the basics.

When I watch a video frame-by-frame, it’s much easier to tell if the bar lags behind my torso as I break the floor or if my hips rise a split second too early. Through the years, this approach has helped me see how my body position incorrectly translated forward and how I needed to alter my hands for a stronger grip.

Yet, I wonder if everyone is using technology to maximize their own lifts, as phones and tablets only tend come out as the weight starts to rise. Using your phone to record every rep will help you drill home the basics, improve on every set, and regulate your training by watching your bar speed. I believe it will maximize your results and your safety more than any accessory exercise or program. And it’s an advantage we didn’t have only a few years ago.

How I Achieved a 3x Bodyweight Deadlift

Tip #2: Stop the Mental Warfare (with Yourself)

As a former back-pain sufferer, I’d argue that the deadlift is the most psychological lift. It also didn’t help that my starting technique was terrible (see above), and I feared the day my discs would finally crumble and leave me in traction. But, as expected, my back started to feel better as I cleaned up my technique.

Still, I had my share of sessions where all I could think about was not getting hurt. As anyone who’s lifted serious weight will tell you, when all you’re thinking about is not getting hurt, that’s exactly when you will.

I knew this fear was holding me back. Desperate for help, I turned to the book Psych by Judd Biasiotto—and I never looked back.

Using Biasiotto’s tactics of positive self-talk and vivid visualization, I slowly started to turn the corner. I distracted myself from fears of injury by creating a mental checklist and routine to perform before each lift. I also used Biasiotto’s muscle relaxing and meditation techniques and found my fear dissipating after a few weeks. Even though I was only performing between 9 and 25 physical reps per week, I completed many more in my mind. When I woke up in the morning, took a shower, or had spare time, I visualized myself completing the perfect rep. Pain-free, of course.

Aside from reaching my deadlift goals, the biggest victory I’ve had is not worrying about back pain in everyday activities. The more progress I saw on my deadlift—aided by better movement, strength, and technique—the less back pain I had in daily life. It only makes sense that being able to deadlift 500 pounds for multiple reps helps eliminate the fear of picking up a load of laundry.

Strength—be it mental or physical—truly has a greater purpose.

How I Achieved a 3x Bodyweight Deadlift

Tip #3: Don’t Miss a Rep

I’ve always struggled with the concept of not training to failure. If I don’t train at maximal intensity, how will I ever improve? What’s the point of having a max deadlift if I can’t do it any given day?

Note: Trust me, I understand the irony of these questions given my two previous points. I consider it a minor miracle that training at a high intensity with terrible technique never yielded any actual injuries in the early days, only mental blockages.

Regrettably, training at near max-effort every session was my mindset for years. I was lifting at too high a percentage, grinding out lifts, and thinking I had won the day. My progress was great—until it wasn’t.

When I attended my SFG Certification, my thinking finally changed. When speaking about programming, Chief SFG Instructor Brett Jones offered up this brilliant thought, “Only the mediocre are always at their best.”

That idea saved me from myself.

In previous years, I had never missed a deadlift day and tried to peak every month. If I missed a few lifts during the cycle, oh well. I’d recast my numbers to a (slightly) lower percentage and start again, thinking it was the only way to progress.

But after hearing Brett’s advice, I stopped putting pressure on myself and started believing in my program and my system. I followed the same program as before—a basic 5/3/1 template—but changed my numbers to allow for a longer-term approach, only peaking one or two times per year. I started to enjoy my lighter days instead of thinking they were a waste of time, because I realized they would still improve my technique (see Tip #1) without sapping my recovery.

How I Achieved a 3x Bodyweight Deadlift

Most importantly, this approach ensured I never came close to missing a rep. There’s something magical about failure not being a possibility, because it allows you to build each week, gain confidence, and “sneak up” on new personal records. With this success and the mental preparation of Tip #2, I started to feel invincible on the platform.

A great example of how this change in philosophy and commitment to lighter work came together was a sumo cycle where I hovered around 77% (400 pounds) on my working sets. On the last day of the cycle, I decided to test where I was before I switched back to training the conventional deadlift. I pulled 500 pounds for a set of 5—a personal record at the time and the easiest the lift had ever felt.

Most of us don’t need to put in as much effort or training time as we think. Allowing yourself to train at sub-maximal weights will allow you to see plenty of gain, without the pain. Because the adaptations we seek aren’t just physical, we’re developing the skill and the mind, too.

The Basics: How to Increase Your Deadlift

Will a simplified approach always lead to the best results? Of course not—every athlete, goal, and situation is different. But the basics are not. Using video to perfect your technique, making sure your mental strength matches your physical strength, and never missing a rep might just be your key to progress.

And if you’re like me, it might just save you from yourself.

The post How I Achieved a 3x Bodyweight Deadlift (and You Can Increase Your Deadlift, Too) appeared first on StrongFirst.

My Training Shoes: My Recommendations and Why

$
0
0

When you are training, one of the decisions you make before you start each session is whether you will be wearing training shoes. While training barefoot certainly has its advantages, both physically and neurologically, there will be certain times when wearing the proper shoe is paramount to your training success.

If a person is not training barefoot, then there are several shoe options to choose from. At the SFL Certification and SFG Certification, I frequently get asked what kind of training shoes to wear. Most of you know that I used to compete in the sport of powerlifting prior to playing American semi-pro football. As a result, over the years, I have gathered various shoes for training and each has its specific purpose, both for powerlifting and for general training.

In this article, I will discuss each of my training shoes in detail.

My Old Safe Squat Shoes

My Old Safe Squat Shoes

These shoes have been with me through thick and thin. Scott Safe, who used to make these shoes at his facility in Cannon Falls, Minnesota, sold the rights to these shoes to Titan Support Systems, located in Corpus Christi, Texas. Titan is a huge supporter of the sport of powerlifting, so if you need any powerlifting gear, from raw to fully equipped, they are the people to call.

Titan is currently making these shoes and they are the best out there when it comes to powerlifting. They are a bit pricey, costing between $210-350 per pair. However, this cost is well worth it for the proper support during a heavy squat training session or a powerlifting meet. Plus, you will probably wear them one to three times per week for one or two hours per training session. It’s not like you are wearing them every day for work or going out to the clubs at night! So, while these shoes probably won’t last literally forever, they will last you a long time.

What I like about these shoes:

  1. Heel counter: Very stiff and hard. When you put these shoes on, you realize your heel will stay where it is. If you supinate or pronate while squatting, this shoe will help decrease that. That said, I would suggest you still locate your nearest health professional to help you correct that issue.
  2. Sole of the shoe: Very hard and non-compressible. When using a shoe during squatting, the last thing you need is a sole that gives while you are pushing up a tough fifth rep at 85% of your 1RM.
  3. High top: This will help support your ankle in addition to the rest of the foot.
  4. Strap: The strap will lock down the shoe even more than the shoelaces. Trust me, you want the shoe to feel as if it is part of you. No moving around allowed.

These shoes would work well for the barbell trainee, whether he or she competes in powerlifting, weightlifting, or not.

Note: This article is for every trainee, from the beginner to the world-champion competitor in his or her respective sport, and we’ll talk about which of these shoes work for kettlebell and bodyweight training, too.

My Adidas Lifting Shoes

My Adidas Lifting Shoes

Adidas weightlifting shoes have the same qualities as the Safe Squat Shoes, but with two distinct differences:

  1. Low top: A greater forward shin angle is possible with this shoe because of the low top. In addition to squatting, I have also used these shoes to bench press. The shoes allowed me to increase the amount of forward shin angle and get my heels farther back toward my head, allowing me to generate more tension anteriorly, all the way to my upper body.
  2. Heels: They are at bit thicker than the Safe Squat Shoes, elevating your heel higher.

I have competed in the squat with these shoes and did very well with them. Of course, they can be used for the Olympic lifts as well.

My Adidas Wrestling Shoes

My Adidas Wrestling Shoes

Why do I have a pair of Adidas wrestling shoes? Is it because I am thinking of getting back into wrestling? Nope. It is for deadlifting.

When you deadlift, the center of the bar travels a certain distance off the ground. If anything is under your heel, that means you are actually moving the bar a further distance than if you were barefoot. A wrestling shoe has a very thin bottom. It allows me to have something on my feet, but something that is very thin and with a flat bottom, too.

Of course, you could deadlift or train barefoot, but I like to “dig” my foot into the ground prior to deadlifting. I cannot do this properly barefoot. Plus, when competing in the sport of powerlifting, you must be wearing something on your feet.

This shoe can be used for sumo and conventional deadlift stances. It is also a very good shoe for training indoors if you should desire to use it for this.

On the flip side, I will warn you: when you want to purchase these type of shoes, think ahead. Most sporting goods stores stock them during the late summer all the way to near the end of March. If you decide to buy these during the off-season, good luck. Most stores do not keep them in stock, so you may need to order them online which can make sizing challenging.

My Adidas Samba Shoes

My Adidas Samba Shoes

These Adidas Samba shoes were originally designed to be indoor soccer shoes. While they are still used for this purpose, many people purchase them for general wearing and use. I have now bought at least eight pair in the last ten years and mainly used them for training.

I started using these shoes when I retired from powerlifting and decided to start another chapter of my life, semi-pro football. These shoes were used for sprint and agility training on asphalt and track surfaces in addition to indoor gym surfaces. I’ve worn them for deadlifting, squatting, bench and military pressing, and all sorts of barbell and kettlebell training. I have also worn them for teaching at SFG and SFL Certifications during the last five years. These shoes have served me well.

A few notes about these shoes:

  1. They are a good, virtually flat-bottomed shoe.
  2. I have used them for barbell training with what I consider lighter weight, meaning up to 60-65% 1RM. Anything heavier and I switch to my aforementioned lifting shoes.
  3. I find that these shoes need to be replaced almost yearly, if not sooner, when you’re doing consistently weekly training for two or more sessions per week.

But, again, I love these shoes. They have withstood the test of time.

My Vibram Five Fingers

My Vibram Five Fingers

Vibram Five Fingers are a very interesting pair of shoes. I originally purchased them because I had a lot of patients and students buying them or thinking of buying them and asking me questions. In my opinion, they are the nearest thing to training barefoot without being barefoot.

I personally prefer to not wear a sock with them. It feels weird to me and I feel a little slipping while wearing them. But based on what others have told me, it seems to be a personal experience on whether to wear a sock or not.

I have barbell squatted, sprinted, done bodyweight and kettlebell training sessions, and even deadlifted in these shoes, all with good results. I have nothing but good things to say about them. They are also easy to care for. I usually throw them in the washer and line dry them after two or three training sessions.

One note about these: if you wear orthotics and/or a heel lift, they will not fit into some of the different types of Five Fingers.

Which of These Training Shoes Is for You?

Each and every shoe mentioned above has its own purpose. Decide which one, two, or more that you need and wear accordingly. Everything from the Vibram Five Finger minimalist shoes to the heavy-duty Safe/Titan shoes can be worn by the weight-room trainee for different purposes and results. If you buy quality training shoes, they will last you for years and serve you well during your sessions. Happy strength-shoe wearing!

The post My Training Shoes: My Recommendations and Why appeared first on StrongFirst.

TSC Recap and Results: Fall 2017

$
0
0

Ladies and gentlemen, the 2017 Fall TSC results are in!

First, thank you to everyone who participated in this unique worldwide event. With just over 1,100 competitors from around the globe, once again our women’s novice division was our biggest division.

TSC Recap and Results: Fall 2017

It was great to see so many new faces and names embracing strength as a mother quality. But most importantly, it was great to see people face their fears head on.

As someone who has been a competitor in some form for many years, I know it’s not easy to stand in front of a crowd, be the highlight of the room even for a brief moment, and perform. Fear of failure can be our greatest adversary—if we let it be.

I have the highest respect for people who step up and face their fears, no matter how big or how small the challenge. So, to everyone from the first-time and tenth-time competitors, I salute you.

TSC Recap and Results: Fall 2017

As usual, there were many personal records in each event with 35 of them coming out of Omaha Elite Kettlebell alone. In addition, Team TNT Fitness Results represented in six of the nine divisions. But the coolest thing I saw was gyms—like Game Changers Health, Hardstyle KBJJ, Prevail Strength, and Kettlebell 360 to name a few—combining forces to compete under one roof as one team. There is strength in numbers!

With that said…

We Have a New King and Queen of the Men’s and Women’s Elite Divisions

Adam DeMarais taking over the throne should make for a great showdown in the spring when Derek Toshner returns to try to reclaim what has been his for many years.

We also have a new Queen of the Women’s Elite, Jackie Michaels. This will also make for a great showdown in the spring as Hyunjin Choi will seek to regain her crown with contenders Jessica McCutcheon-Schour and Debbie Hayes (tied for third this time around) not far behind.

TSC Recap and Results: Fall 2017
Top: Adam DeMarais; Bottom: Jackie Michaels

TSC Recap: Top Combined Scores in Each Category

Now, let us acknowledge the highest combined scores in each of the eight categories. (For full rankings and results, please visit the leaderboard.)

Women’s Novice

1st: Kelsey Lightfield, TNT Fitness Mensha—Snatches 143, FAH 66 sec, Deadlift 260

2nd: Katie Ludwig, Noonan Sport Specialists—Snatches 119, FAH 89.09, Deadlift 285


Women’s Novice 16kg

1st: Julie Bigger, Noonan Sport Specialists—Snatches 115, FAH 76.59 sec, Deadlift 210

2nd: Stephanie Marotta, Gunning Elite—Snatches 126, FAH 31 sec, Deadlift 255

3rd: Angela Walker, Unaffiliated—Snatches 98, FAH 73, Deadlift 285


Women’s Open 12kg

1st: Eva Docen, Iron League Fitness—Snatches 150, Pull-ups 12, Deadlift 310

2nd: Charissa Hulse, The Work Shed—Snatches 139, Pull-ups 10, Deadlift 315


Women’s Open 16kg

1st: Sara McBride, Claymore CrossFit—Snatches 147, Pull-ups 16, Deadlift 377

2nd: Noriko Kariya, TK—Snatches 125, Pull-ups 17, Deadlift 320

3rd: Lisa H, NA—Snatches 124, Pull-ups 12, Deadlift 385


Women’s Elite

1st: Jackie Michaels, TNT Fitness Results—Snatches 134, Pull-ups 11, Deadlift 400

2nd: HyunJin Choi, Powerzone—Snatches 120, Pull-ups 9, Deadlift 370

3rd (TIE): Jess McCutcheon-Schour, Ethos Fitness + Performance—Snatches 113, Pull-ups 6, Deadlift 350

3rd (TIE): Debbie Hayes, In My Garage—Snatches 105, Pull-ups 11, Deadlift 265

3rd (TIE): Analisa Naldi, Evolutions Trainer—Snatches 120, Pull-ups 7, Deadlift 300


Women’s Masters

1st: Patti Opalacz, TNT Fitness Results—Snatches 151, Pull-ups 10, Deadlift 350

2nd: Salwa Flewell, ProjectMove—Snatches 146, Pull-ups 14, Deadlift 245


Men’s Novice

1st: Ray Vazquez, TNT Results Fitness—Snatches 146, Pull-ups 24, Deadlift 445

2nd: Josh Sherwell, Laced Up Fitness—Snatches 139, Pull-ups 20, Deadlift 463


Men’s Open

1st: Dale Taylor, The Yard Athletic—Snatches 151, Pull-ups 22, Deadlift 529.10

2nd: Andrew Soderstrom, Crossfit Of Aces—Snatches 142, Pull-ups 21, Deadlift 501


Men’s Elite

1st: Adam DeMarais, Unaffiliated—Snatches 111, Pull-ups 15, Deadlift 595

2nd: Tim Barrett, Lifetime @ Sky Manhattan—Snatches 123, Pull-ups 15, Deadlift 572

3rd: Karl, Westshore Wearhouse—Snatches 129, Pull-ups 13, Deadlift 585


Men’s Masters

1st: Mike Knight, Art of Strength—Snatches 150, Pull-ups 15, Deadlift 440

2nd: Steven Surgeoner, Croffit Berserk—Snatches 114, Pull-ups 13, Deadlift 385.81


Congrats to you all! See you in the spring!

The post TSC Recap and Results: Fall 2017 appeared first on StrongFirst.

All-Out Competition, or Fat-Loss and Status Check: Two Other Reasons the Tactical Strength Challenge is Good for You

$
0
0

The Tactical Strength Challenge is a twice-yearly event with participants all over the globe. For one day in April and October, people on six continents are joined together in three events. As a Host, Coach, Judge and participant of several TSCs I’ve seen three clearly defined reasons, or purposes, that see people enter the TSC.

1. The Competitors

For some, the TSC has become their sport. These guys are in it for the competition. Be that to win in their local event, break into the global top ten, or to straight up win their division.

2. A Personal Challenge

Some view it as a personal challenge or as a bit of fun. They might be a non-competitive health-focused trainee who has been convinced to enter by their Coach or training buddies.

3. The Weekend Warriors

These guys don’t train for the TSC specifically, but are generally focused on training for a sport or other physical pursuit. They tend to use the TSC as a six-month ‘status check’ on their general, overall strength and fitness.

Although there is an official, global leaderboard and “division winners,” the TSC isn’t just an event for elite competitors. It has many purposes and applications. Many of these stem from the where and why of its origins. So for a full and deeper understanding, let’s take a trip down memory lane.

kettlebility tsc

The History

Almost 20 years ago, StrongFirst Founder and Chairman Pavel Tsatsouline provided subject-matter-expert strength and conditioning support to several military and police groups. This was also around the time of the dawn of the hardstyle kettlebell revolution, with Pavel leading the charge with his instructor certifications and seminars.

With a rapidly expanding group of kettlebell instructors and enthusiasts, and growing interest in this cannonball with a handle, Pavel decided to organize a competition/challenge for this growing community. Something to inspire competition, bring a degree of focus and clarity to their training, and encourage people to surpass their expectations.

Coming from a background of working with law enforcement and military organizations, he chose three exercises that would serve as fantastic preparation for service readiness.

The three original exercises he chose were:

  • Weighted pistol squat for maximum repetitions (one side change)
  • Weighted pull ups for maximum repetitions
  • 5 minutes of kettlebell snatches for maximum repetitions (one hand change)

At this inaugural TSC, there were two divisions:

  • Special Operations: 32kg kettlebell
  • Ready to Defend: 24kg kettlebell

In an added twist, the pistol and snatches were performed both sides for max reps but the lower of the two sets would be the competitor’s score. If a competitor were to score 20 snatches left-handed and 25 right-handed, they would score 20. If they could perform 5 pistols on their right leg but none on their left, then their score would be zero. No asymmetric performances permitted! This is a nod to Pavel’s classic work The Naked Warrior which highlighted the understanding that major asymmetries can be injuries waiting to happen.

The Special Operations division of the first TSC was won by none other than our current Chief SFG and StrongFirst Director of Education, Brett Jones.

Brett Jones


Although the pistol squat is an excellent developer and demonstration of lower body strength and mobility, Pavel ultimately replaced it with the barbell deadlift. This introduced an element of absolute raw strength, and the format has remained the same ever since.

The Modern Age

The present-day Tactical Strength Challenge:

  • One maximal barbell deadlift (three attempts, no hitching)
  • Max repetition pull ups (dead hang, no kipping)
  • Max number of kettlebell snatches in 5 minutes

Competitors may choose one of ten divisions (male, female, masters, novice, open, elite, etc.) all with different criteria (12-32kg kettlebells, hang for time or weighted pull ups, etc.). The TSC is a brilliant indicator of three different aspects of strength and fitness.

TSC-April-2016-2 - Hyun Jin Deadlift

Three Strength Qualities: Absolute, Relative, and Endurance

Absolute Strength—The Deadlift

The most fundamental and primal of all the barbell lifts. The deadlift is a demonstration of pure, unadulterated, absolute strength. This lift clearly favors the bigger competitors, but that is no excuse not work on this lift as the benefits it brings to your sport and everyday life are massive.

Relative Strength—Pull Ups

The pull up is a demonstration of relative strength and mastery of your own bodyweight. If you pursue absolute strength to the extent that you put on extra body mass, your pull up numbers will suffer. The pull up is a natural complement to the deadlift in that striving to improve both is extremely likely to result in an athletically functional body—and one that turns heads for all the right reasons. All of this said, the pull up will favor the lighter athlete.

Endurance Strength—Snatches

High-repetition kettlebell snatches are a demonstration of strength and power that can keep on going. Strength without endurance or repeatability does not align with the origins of the TSC, where a military or LEO professional is expected to be able to hit hard, fast, and often. The snatch balances the ‘low cardio’ of the deadlift and pull up and is a fantastic fat-burner. Serious training in the snatch will see your pull up numbers go up as your waist size goes down.

Of all the events, the snatch tests lungs and guts the most. Large or small competitor, the snatch shows no favoritism to anyone.

C = Challenge, not Competition

One of the brilliant things about the TSC is that, twice a year, you are able to compete with people in gyms all over the world. The online leaderboard for each division is updated in real time as gyms all over the globe report their scores. For the competitive among us, it is a great day to see ‘where you stand’.

But, let’s take a side step for a minute.

Fat-loss author Josh Hillis in his book Fat Loss Happens On Monday observes that if people can perform the following physical feats and still aren’t happy with their body, then their problems are in the kitchen and not the gym (and if people can perform the following standards, they probably already turn heads for all the right reasons and just need to buy a new mirror!).

Hillis chart

So hopefully you see where this is going.

female pull up tsc

The TSC and these strength goals for fat loss tie together quite well. In fact, most TSC prep-plans add some form of pressing training (illustrated in in Josh’s standards by the dip). From a TSC perspective, the press training (kettlebell presses, barbell presses, get-ups, etc.) are included to encourage shoulder health and as an assistance drill for the snatch. Also, who doesn’t want a heavier overhead press?!

We can approach the TSC not only as a competition to do well in, but also as an event which will progress our fat loss/body composition goals. So even if we aren’t a competitive participant, it can hold value for us. It connects us to a greater community. It gives us a series of achievable standards—which, therefore, increases the likelihood of program adherence.

The Weekend Warriors

There are also serious weekend warriors who don’t actually train for the TSC directly, but use the TSC as a twice yearly check-up.

If, without training specifically for the TSC, they maintain or improve their scores—they are happy. If their score on any of the events drops massively, then this is an indicator that they need to alter their current training regime (or address this area in their next training block).

So what we have in the TSC is an event that links us to a healthy community of like-minded people, and allows us several different reasons for entering.

So whatever your focus or goal, there is a good chance that training for the TSC can help you move towards that goal.

Special thanks to Brett Jones for his help in writing this piece.

Registration for the April 2018 TSC is open! Select your location and division HERE.

The post All-Out Competition, or Fat-Loss and Status Check: Two Other Reasons the Tactical Strength Challenge is Good for You appeared first on StrongFirst.

Viewing all 77 articles
Browse latest View live


Latest Images